Emacs for Programming Languages course on Coursera
Table of Contents
I wrote this tutorial for those who are learning Programming Languages
course on Coursera. The course suggests students to use Emacs, but a
stock one. This can cause confusion for new users since it does not
include sml-mode by default. I made a Emacs kit specialized for this
course here, with external common packages used by the Emacs community
to empower Emacs: https://github.com/tuhdo/emacs-proglang.git
The kit is battery included: after cloning it, just open your Emacs and use it. You don't have to do anything else. I assume you know nothing about Emacs and I will provide a basic workflow for you to use Emacs through the course. Currently, I will write a guide for SML first. Racket and Ruby will come later.
Before using Emacs:
Emacs and SML in Linux:
Easy way to install if you are using Ubuntu: sudo apt-get install
emacs smlnj. If you use other Linux distributions, use the package
manager of your distribution and install Emacs.
After that, clone the Emacs kit to your ~/.emacs.d:
git clone https://github.com/tuhdo/emacs-proglang.git ~/.emacs.d
Emacs and SML Installation on Windows
- If you don't have Emacs yet, download the 64 bit version here: http://sourceforge.net/projects/emacsbinw64/, unpackage it to C:\Program Files\ , then create a shortcut in your desktop to runemacs.exe, an executable in the emacs\bin directory.
- Now, clone my Emacs kit:
git clone https://github.com/tuhdo/emacs-proglang.git ~/.emacs.d
- Or, if you don't have git, download release package in either zip or tar.gz format at: https://github.com/tuhdo/emacs-proglang/releases.
- You should unpackage into ~/.emacs.d. But before that, you must define your HOME and PATH directory.The path ~/ stands for $HOME path in Linux, and is the default directory allocate for each user and the user can put whatever he/she wants there. PATH is an environment variable in Linux that makes the shell see executable programs, so you can execute them by specifying the program name only. We can use the same thing in Windows.
In Windows, to set your HOME variable: left clicking My Computer -> Properties -> Advanced System Settings -> Advanced -> Environment Variables -> New. Then enter HOME in
Variable
  name
, and a path of your choice inVariable value. After this, Emacs can see the init fileinit.elin you.emacs.ddirectory. Remember, you have to put .emacs.d in your home directory. For example, if you home directory that you assigned to the HOME variable is C:\home\, then you must put .emacs.d there.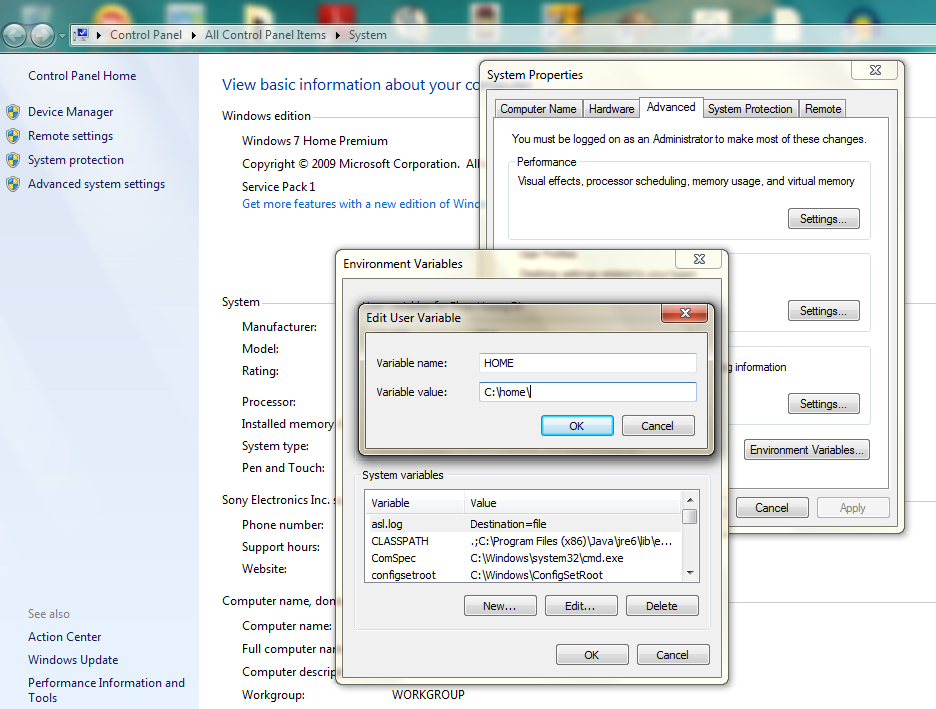
Now that you created a HOME variable, you need to create one more: PATH variable. Emacs searches for any program in PATH variable. Click New, then enter PATH into
Variable name. InVariable value, if you install SML using the standard installer, then it should be at C:\Program Files (x86)\SMLNJ. Paste that path into the text field. In the future, if you want to add more locations that contain programs Emacs can see, add more path and separate each path by a semicolon.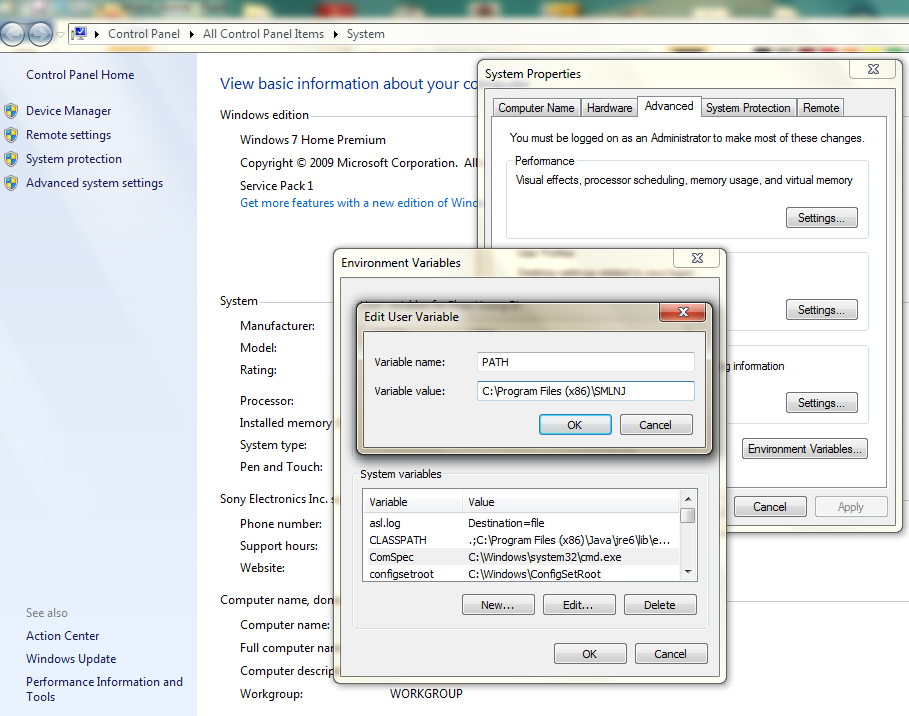
After you finish these two important steps, try running SML inside Emacs by press M-x (Alt + x) then enter run-sml. Press Enter to confirm program to run. A REPL should appear. Congratulation, you succeeded.
Optional but recommended: Swap Control and Capslock
Swapping Control and Capslock, in general, is not required to make the best out of Emacs, if you at least use regular key PC keyboard or better. However, it is not nice at all on a laptop keyboard. If you use a laptop keyboard for writing code, I strongly recommended to swap Control and Capslock for better Emacs experience.
Swapping Control and Caplsock will not only benefit for using Emacs, it is beneficial in general, as Control is a much more frequently used key than Capslock. Popular shells like Bash or Zsh use Control a lot for quick cursor movement.
Windows
Follow this guide: Swapping Capslock and Control keys
Linux
Put this in your shell init file (.bashrc, .zshrc…):
/usr/bin/setxkbmap -option "ctrl:swapcaps"
If you use Ubuntu, follow this guide: Swap caps lock and ctrl in ubuntu 13.10.
Mac OS X
Follow this answer on StackOverflow: Emacs on Mac OS X Leopard key bindings
Optional: changing Emacs look and feel
You can change Emacs look and feel easily:
- Press Alt + x.
- Type customize-theme (you can press TAB to complete).
- There are some default themes there, select the one you want.
You can preview the themes at these two pages:
To install the themes:
- Press Alt + x.
- Type list-packages.
- Search for the theme names using Control + s. After you press Control + s, enter the theme name and press Control + s again for it to jump to the matched text. The theme names are above the preview picture in the first website; for the second website, you replace the space by dash character. For example, if a theme named "Lush Theme", to search for this theme in package list, enter "lush-theme".
General basic Emacs commands
I took some parts from my other guide Emacs Mini Manual (PART 1) - THE BASICS. I recommend you to follow the mini manual when you have time.
Command
In Emacs, every user interaction is a function execution. You press a
key to insert a character, Emacs runs self-insert-command. There are
two types of functions in Emacs:
- Normal functions: These are like functions in other programming languages, and are used for implementing features in Emacs. Users do not need to care about these functions, unless they want to implement something or modifying the implementations.
- Commands: Commands are like functions, but interactive. It means, commands are features provided to users and users directly use them.
execute-extended-command is bound to M-x.
Emacs Key Notation
Taken from here: EmacsWiki
| Prefix | Meaning |
|---|---|
C- |
(press and hold) the Control key |
M- |
the Meta key (the Alt key, on most keyboards) |
S- |
the Shift key (e.g.‘S-TAB’ means Shift Tab) |
DEL |
the Backspace key (not the Delete key). Inside Emacs, DEL |
is written as <backspace>. |
|
RET |
the Return or Enter key |
SPC |
the Space bar key |
ESC |
the Escape key |
TAB |
the TAB key |
A notation such as C-M-x (or, equivalently, M-C-x) means press and
hold both Control and Meta (Alt) keys while hitting the x key. From
now on, I won't say something like "Press M-x" anymore. For example,
if I say "C-x C-f your files", you should replace C-x C-f with its
command like this in your head: "find-file your files". All commands
use verbs, I think, so don't worry. Try to recall the command from the
key binding; it will help you get used to Emacs quicker. One exception
though, I only say "press key" if key is a single character on the
keyboard.
If you see M-x command, it means you need to M-x and type
command.
A prefix key is a part of a full key binding. For example, a full key
binding is C-x r l to run the command bookmark-bmenu-list, then
C-x and C-x r are its prefixes. Note that key sequence such as
C-x and M-x are considered a single character. Knowing prefix key
is handy: if you forget key bindings of some commands that use the
same prefix key, and remember the prefix, you can press the prefix key
and C-h to get a list of commands with that prefix.
For example, C-x r is the prefix for register and bookmark commands in Emacs. However, you forget a specific key binding for a command in those features. C-x r C-h list all key bindings that have prefix C-x r.
Finally, C-g executes the command keyboard-quit, which cancels anything
Emacs is executing. If you press any key sequence wrongly, C-g to
cancel that incorrectly pressed key sequence and start again.
As you gradually learn Emacs, you will see the key bindings are really systematically organized and mnemonic. Whenever you see key bindings end with n and p, it usually means next and previous; o means open; h means help; C-h is standard prefix for help commands; key bindings such as o and C-o are frequently used in many built-in tools such as Dired, Ibuffer, Occur…
Emacs Keys are easy to remember
The key bindings have a few simple and easy to remember rules:
- C-x prefix is for default and global bindings that comes with Emacs.
- C-c prefix is for users to define.
- C-u is for altering behaviors of commands. That is, one command can behave differently depend on how many C-u you pressed first before executing a command. Mostly you just have to hit C-u once.
- C-<number> like C-1, C-2… is similar to C-u, but passing a number to a command. Usually, the number specifies how many times you want to repeat a command.
You will learn about C-u and C-<number> in Prefix Arguments
section.
Most commands can be organized in an easy to remember way. For
example, command like helm-do-grep (the command belongs to Helm, a
3rd party extension to Emacs) can have a key binding like C-c h
g. The h stands for Helm and g stands for grep. So, key
bindings are not difficult to remember.
Some basic commands
Open file: C-x C-f and browse to the file. You can fuzzy match candidates in current directory, e.g "fob" or "fbr" will complete "foobar".
C-l to go back to parent directory and C-j to go down to current highlighting file/directory; alternatively, you can use arrow keys.
C-z to see a list of actions that you can apply on highlighting candidate, TAB to view a file content without visiting it.
C-c o on a file to open that file in another pane (in Emacs, pane is called window).
C-c d on a file to delete it.
- Open recently opened files: C-x b contains a list of opened files and recently opened files. To move between these lists, use left/right arrow keys or use C-o. You can type part of a desired filename and narrow down.
- Close file: C-x k, select a buffer to close. Buffers are simply your opened files, for now. By default, your current editing buffer is at the top. Press RET to confirm killing the buffer.
Basic motion commands
These key bindings are also used by popular shells such as bash or zsh. I highly recommended you to master these key bindings.
- Move forward one char: C-f (f stands for forward)
- Move backward one char: C-b (b stands for backward)
- Move upward one line: C-p (p stands for previous)
- Move downward one line: C-n (n stands for next)
The above operations can also be done with arrow keys. if you don't like the above key bindings, the arrow keys offers equivalent features.
- Move to beginning of line: C-a
- Move to end of line: C-e
- Move forward one word, M-f.
- Move backward one word, M-b.
These key bindings are in Emacs only:
- Scroll forward one screen: C-v, page down
- Scroll backward one screen: M-v, page up
- Move to the beginning of a sentence: M-a
- Move to the end of a sentence: M-e
- Recenter a screen: M-l
- Re-position cursor to the top, middle and bottom of the current screen: M-r
- Move to top of the buffer: M-<
- Move to end of the buffer: M->
- Move to the nth character: M-g c (c stands for
character) - Move to the nth line: M-g l for Emacs < 23.2, M-g g for emacs >=
23.2) (l/g stands for
line)
Recenter means making the current line the cursor is on the center of your screen.
You can quickly highlight a region by pressing C-SPC and use motion commands to select a region.
Exercise: execute the above commands using the key bindings at least 10 times or until you remember. You can perform these motion commands on any buffer.
Incremental search
So, you want to look for something in the buffer? C-s invokes
isearch-forward, allows you to look forward from the current point
for something. After C-s, you are prompted to enter the content to
search for. Enter the content, and press C-s repeatedly to travel
through the matches forward.
Similarly, C-r invokes isearch-backward, allows you to look
backward from the current point. Press C-r repeatedly to travel
through the matches backward.
isearch can be invoked from any valid buffer.
Basic editing commands:
In Emacs, kill means Cut in other editors. These key bindings also
work under the terminal.
- Kill a character at the cursor: C-d
- Kill entire line: C-S-DEL (remember, DEL is your <backspace> key), or C-w (not in stock Emacs)
- Kill forward to the end of a word from current cursor: M-d
- Kill backward to the beginning of a word from the current cursor: M-DEL
- Kill all spaces at cursor: M-\
- Kill all spaces except one at cursor: M-SPC
- Kill to the end of line: C-k
- Kill a sentence: M-k
- Undo: C-/
- Redo: C-?
- Open a list of killed texts: M-y (not in stock Emacs)
- Duplicate line/region: M-c (not in stock Emacs)
- Indent whole buffer: C-c i (not in stock Emacs)
When you kill something, the killed content is put into the Kill Ring.
If you write code, you can also quickly add comments or comment/uncomment code with M-;:
- If you do not highlight a text region, M-; adds a comment to the end of line.
- If you do not highlight a text region and comment is at the end of line, M-; comments the whole line (not in stock Emacs).
- If you do not highlight a text region and your current line is being commented, M-; uncomments the whole line (not in stock Emacs).
- If you highlight a region (i.e. with a mouse), M-; comments out the region.
Buffer commands
Buffer is where you edit your file content. Buffer holds content
of a file temporarily. Anything you write into the buffer won't make
it into file until you explicitly save it with save-buffer
command. C-x C-s executes the command save-buffer, so you can C-x
C-s your files. You can also execute this from M-x*
To save a buffer as other file ("Save As" in other editors), C-x
C-w, which runs the commands write-file.
To kill a buffer, C-x k. If you want to kill the current buffer, RET immediately. Otherwise, type into the prompt the buffer name you want to kill.
In the above section, I said that point is in your file, well, actually point is not in a file but a buffer. From now on, keep file and buffer two separate and distinct concepts. When I say file, I refer to physical file and when I say buffer, I refer to the temporary content of the file that is being displayed.
Exercise: Practice C-x b to get used to it.
| Key | Binding |
|---|---|
C-x C-s |
Command: save-buffer |
| Save the buffer at point | |
C-x C-w |
Command: write-file |
| Save the buffer to a different file | |
C-x b |
Command: switch-to-buffer |
| Switch to a different buffer | |
C-x k |
Command: kill-buffer |
| Kill a buffer. RET to kill the | |
| currently active one |
Window commands
Unlike other editors, Emacs can split your frame area into multiple smaller
areas. Each such area is called a window. You can divide a frame
into as many windows as you want and each window can have anything in
it, i.e. your current editing buffer, file management buffer, help
buffer, a shell… Basically anything that Emacs can display. Let's try them out:
Exercise:
C-x 2 to split the current window into two horizontal windows. After
splitting, you will have the exact duplicate of your current editing
buffer. split-window-below is bound to C-x 2.
C-x 3 to split your current window into two vertical windows. After
splitting, you will have the exact duplicate of your current editing
buffer. split-window-right is bound to C-x 3.
Now, after you execute the two commands above, you will have three windows: two above and one below. Each window can hold a buffer. With the above two commands ,you can create arbitrary window layout. In Emacs, a window layout is called a window configuration.
To navigate through the windows, use C-x o which runs the command
other-window. Try cycling around the windows a few times to get used
to it.
In Emacs, <next> is the PageDown key, <prior> is the PageUp
key. M-<next> runs scroll-other-window and scroll the other
window forward; M-<prior> runs scroll-other-window-down and scroll
the other window backward. Other window is the window that you visit
when C-x o.
C-x 0 closes the window at point.
C-x 1 closes all other windows except the currently selected one. Try creating another window, try C-x 1. Only in my distribution: C-x 1 again opens previous window layout.
Commands for SML
You need these three essential commands to work with your SML
assignments. All the demos begin when you see START at the bottom:
C-c C-s runs command
sml-prog-proc-switch-toDescription: Start SML REPL.

C-c C-b runs command
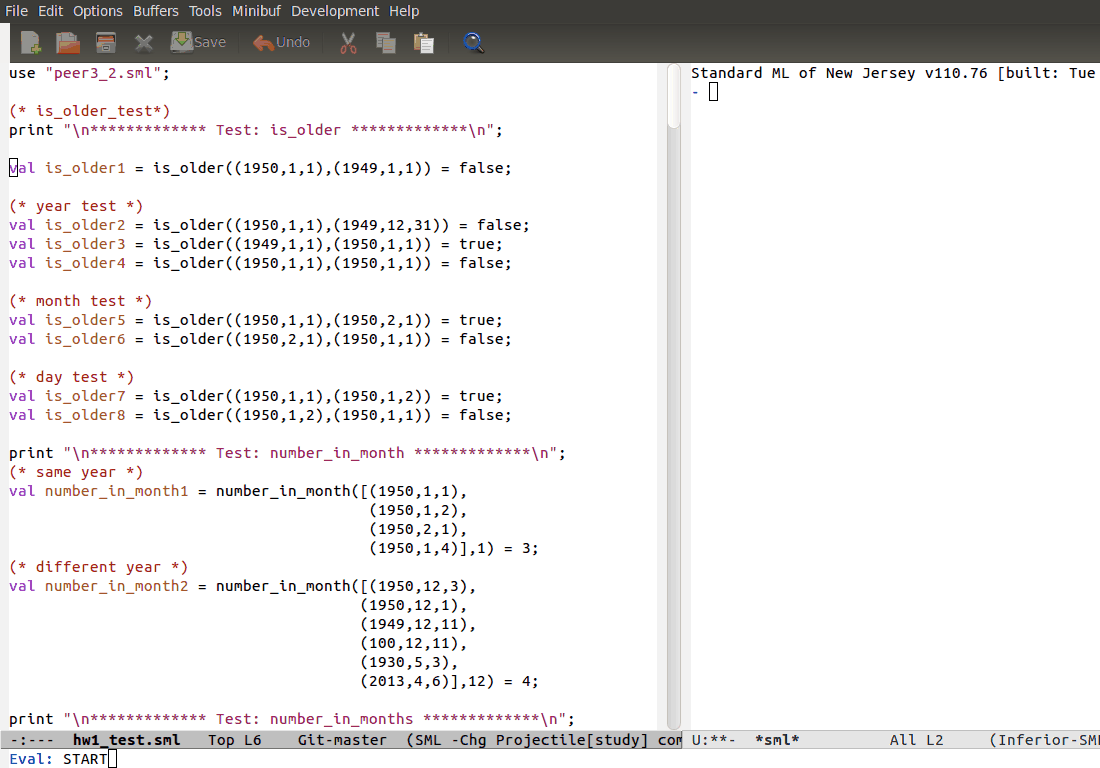
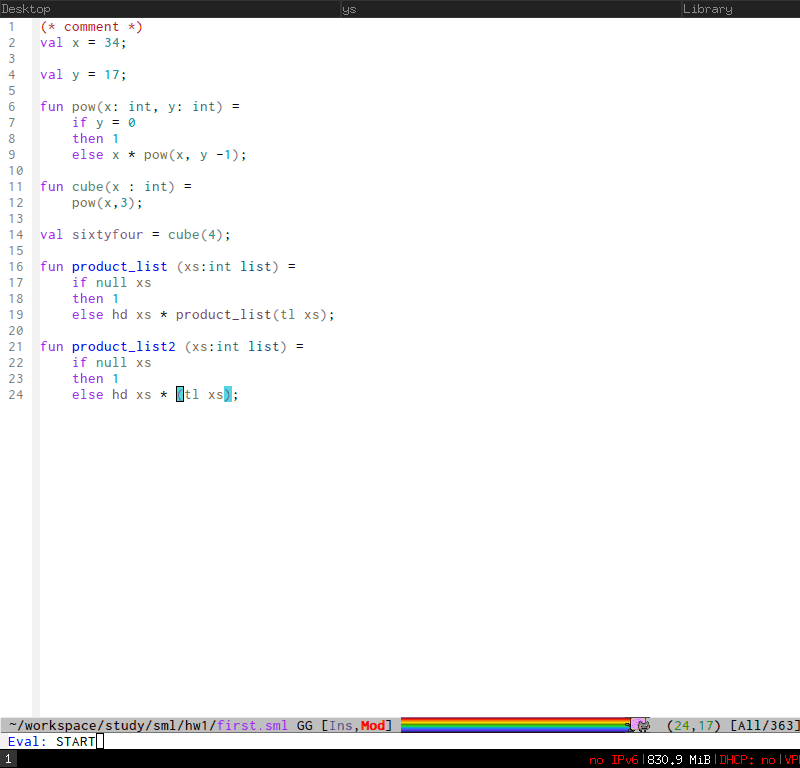
sml-prog-proc-send-bufferDescription: Send the current editing buffer to SML REPL for evaluation. Here is an example of evaluating an SML test file:
C-c C-r runs Command:
sml-prog-proc-send-regionDescription: Similar to
sml-prog-proc-send-buffer, but instead of sending buffer to the REPL, send a highlighted region. This is useful when you want to evaluate individual expressions.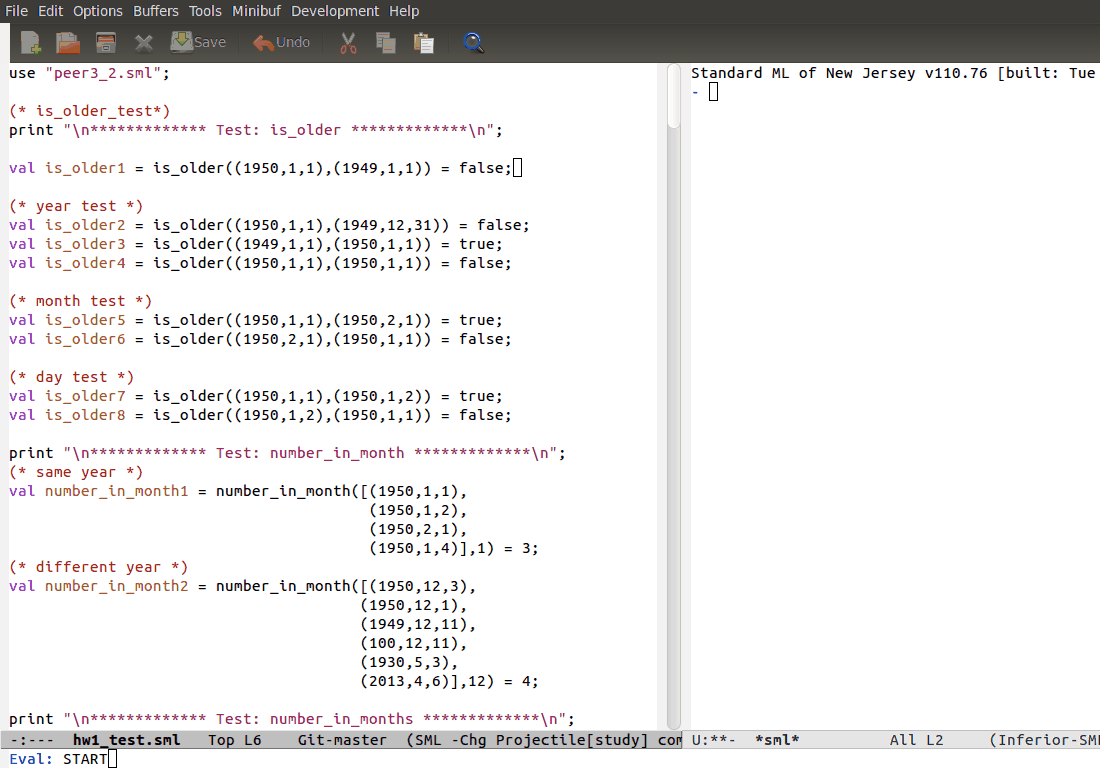
Other useful commands
C-c h i runs command
helm-semantic-or-imenuthat lists variable and function definitions in current buffer.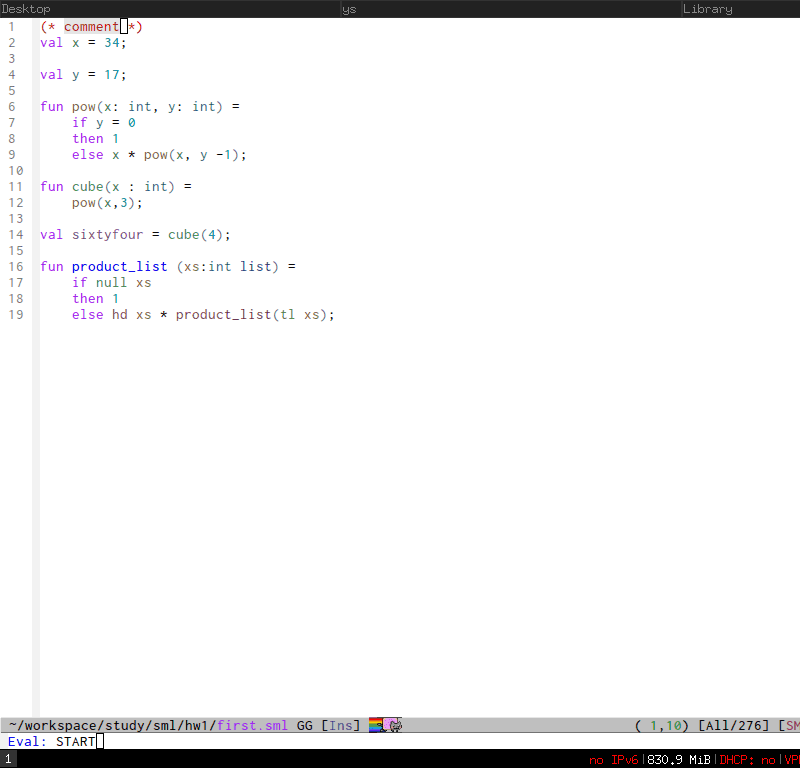
Auto-completion: pressing TAB brings up an interface for identifier completion. If you type a few characters and stop for a little moment, a completion popup appears with suitable candidates.
Commands for Racket
Editing support: You don't have to fight the parentheses
Automatic indentation
aggressive-indentis a minor mode that keeps your code always indented. It reindents after every command. It is available for Lisp modes (such as Racket, Common Lisp, Emacs Lisp…) in this distribution for the course.
- You can also run C-c i to indents whole buffer. In Lisp modes, you won't need it; but for other programming modes, C-c i is always useful.
Automatic comment
comment-dwim2 is a package that provides extended features compare
with the original command comment-dwim. dwim stands for do what i
mean; it means that the commands with dwim suffix changes it
behaviors based on context at point. For example, comment-dwim2
comments line at point if it is uncommented; execute again uncomments
the line and put a comment at end of line; execute again comments the
whole line; execute again uncomment the line and returns to original
state and we repeat the whole process again. These behaviors work on
region as well.
You can click the link to the homepage to see the demos.
Basic navigation for Lisp expressions
C-M-f binds to
forward-sexp, move forward over a balanced; C-M-b binds tobackward-sexp, move backward over a balanced expression. Demo:
C-M-k binds to
kill-sexp, kill balanced expression forward. Demo: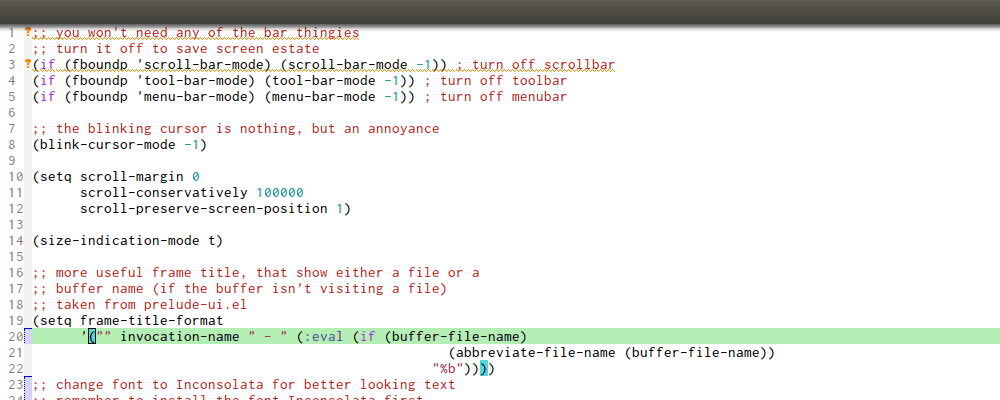
C-M-t binds to
transpose-sexps, transpose expressions. Demo:
C-M-<SPC> or C-M-@ binds to
mark-sexp, put mark after following expression. Demo:
These key bindings not only work for Lisp mode, but for any programming languages as well. You can use C-M-b and C-M-f to move back and forth between any punctuation pair, or move to the beginning and end of an identifier. You can learn more advanced movements using a package named ParEdit. The movements are described in this cheatsheet. In my prebuilt Emacs configuration for you, it uses
smartparenspackage, butsmartparensalso includes all the features of ParEdit.- In my Emacs kit for this course, C-j is bound to
helm-semantic-or-imenu. It is a convenient way to navigate between definitions in your buffer. Whenever you activate the command, and if cursor is inside a definition (such as function definition, variable definition), the highlighter is positioned at the tag in the Helm buffer. This, in combination with C-<down> and C-<up> to move between definitions in your buffer. You can use this command to move around buffer effectively.
The full instructions are in helm-semantic-or-imenu section of the Helm guide.
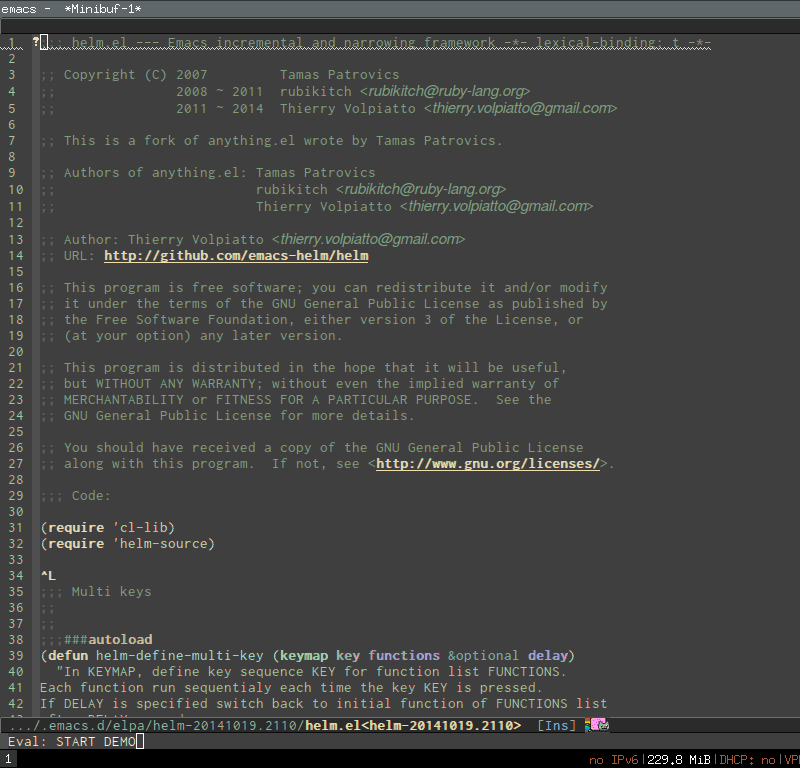
DEMO (begin when START DEMO is in minibuffer):
- First, I use helm-semantic-or-imenu to move to the function helm-define-key-with-subkeys and move point there.
- Then, I start helm-semantic-or-imenu again and helm-define-key-with-subkeys is pre-selected.
- Then, I move point to the variable helm-map and execute
helm-semantic-or-imenuagain on two function:helm-next-sourceandhelm-previous-source. This time, instead of showing the current definition I'm operating in (which ishelm-map), it shows the other two definitions in Helm Semantic buffer. This is because I supplied a prefix argument before running the command.
Geiser commands
What is Geiser?
From the homepage:
Geiser is a collection of Emacs major and minor modes that conspire with one or more Scheme interpreters to keep the Lisp Machine Spirit alive. It draws inspiration (and a bit more) from environments such as Common Lisp’s Slime, Factor’s FUEL, Squeak or Emacs itself, and does its best to make Scheme hacking inside Emacs (even more) fun.
When working with a fully conniving Scheme, Geiser can offer the following functionality:
- Form evaluation in the context of the current file’s module.
- Macro expansion.
- File/module loading and/or compilation.
- Namespace-aware identifier completion (including local bindings, names visible in the current module, and module names).
- Autodoc: the echo area shows information about the signature of the procedure/macro around point automatically.
- Jump to definition of identifier at point.
- Access to documentation (including docstrings when the implementation provides it).
- Listings of identifiers exported by a given module.
- Listings of callers/callees of procedures (only available in Guile Scheme).
- Rudimentary support for debugging (when the REPL provides a debugger) and error navigation.
- Support for multiple, simultaneous REPLs.
- Support for image display in those Schemes that treat them as first class values.
This tutorial only offers a subset of these features, enough to mkae you comfortable with the course.
Basic workflow
- Split your Emacs in two windows: one for source code, one for REPL
- Write some code in source buffer.
- Evaluate whole buffer and switch to the context of that buffer with C-c C-a. When you write a Racket file, you are writing a module. To use definitions in the module, you have to switch to that module. C-c C-a automatically evaluates the file of current working buffer and switch context to that module. Note that if you haven't save your buffer, Geiser will use the last saved state. You can also use C-c C-b to execute current file without switching to the REPL. This is useful when you want to write and run test continuously, i.e. write a few tests then execute, then write a few more and test a few more etc…
- Play with your code in the REPL and see the result instantly.
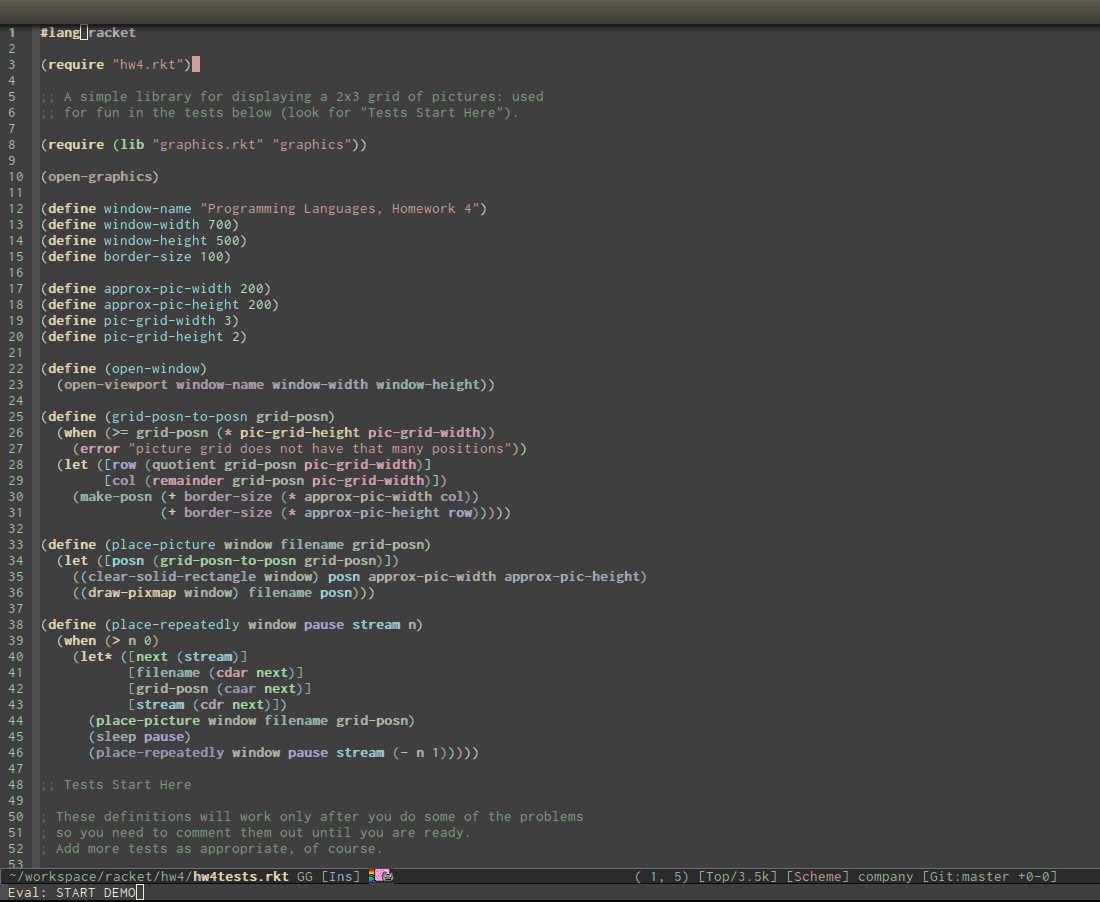
Demo (begins when START DEMO appears in minibuffer):
In this demo, I executed my test case with C-c C-a. The test
were sequentially executed and the results were printed on the
REPL. In case it Racket requires graphics, a Window is popped up as
you can see in the dan-then-dog function test.
Programming assistance
Geiser also provides common features found in IDE:
Autodoc: The minibuffer shows information about the signature of the function/macro around point automatically. It is enabled by default when
geiser-modeis activated.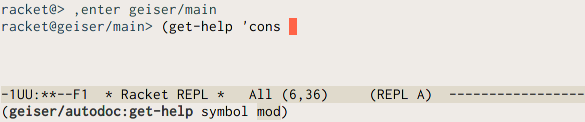
- Code completion: Geiser uses Emacs's default
completion-at-pointcommand to provide completion candidates. By default, it is bound toC-M-i(the equivalent ofM-TAB); in my Emacs configuration for this guide, I bound it toTABfor buffers with Geiser mode for convenience. - Jump to definition: You can jump to any symbol at point in a Racket buffer while Geiser REPL is active with M-.. To go back to where you were, use M-,.
Open documentation at point: For any symbol, you can execute C-c C-d C-d to open a buffer that has a brief summary of that symbol, along with two buttons for accessing either its actual source code:
[source]button or its HTML documentation in an external browser:[manual]button.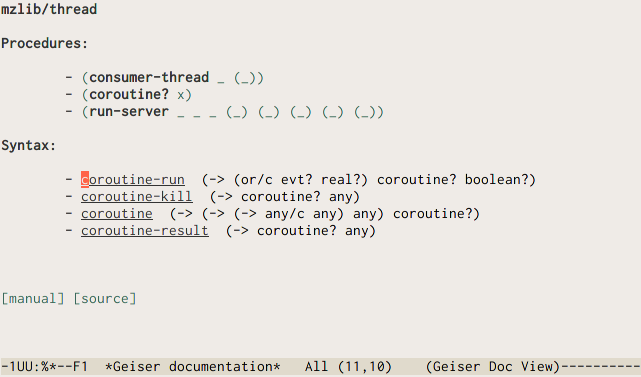
- More evaluation commands: These commands works at expression level.
| Key | Command | Description |
|---|---|---|
| C-M-x | geiser-eval-definition |
Eval definition around point. For example, if |
| point is inside a variable or function definition, | ||
| this command evaluates the whole definition form | ||
| C-x C-e | geiser-eval-last-sexp |
Eval sexp before point |
| C-c C-r | geiser-eval-region |
Eval region |
These are enough for the Racket part of the course. To learn more Geiser features, please refer to official documentation.
Conclusion
That's it for the basics. I hope it provides you a much better experience with SML and Geiser for the course. You can learn more about Emacs in my other guides.