C/C++ Development Environment for Emacs
Table of Contents
- Introductory demos
- Quick setup
- Source code navigation
- Browse source tree with
Speedbarfile browser - General completion with
company-mode - Demo project
- Source code completion using Clang
- Header file completion with
company-c-headerspackage - CEDET
- Code refactoring
- Navigate system include path
- Project management with Projectile
- Source code information
- Source code documentation
- Source code editing
- Compilation Support
- Debugging
In this guide, I will help you to setup an efficient working C/C++
environment. Despite looking long, the setup is short and easy (mostly
copy/paste Emacs Lisp code into your init.el); most of the guide are
explanations and demonstrations of many useful features. Following
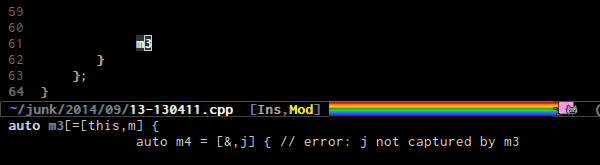
this guide, you should be able to browse the Linux kernel source tree
inside Emacs effortlessly, such as jump to definition/references at
cursor, go back and forth between jumping points, finding any file
instantly, switching between .h and .c/.cpp.
Please remember that there's a table of content on the top right corner and you can use it to navigate this guide. If you feel your internet connection is too slow for my guide, you can always clone and read it offline: https://github.com/tuhdo/tuhdo.github.io
Introductory demos
- Switching between .h and .c/.cpp anywhere in the project like Linux kernel. If more than one file exists, it displays a list of possible candidates. The command collects files of the same names but different across the project:
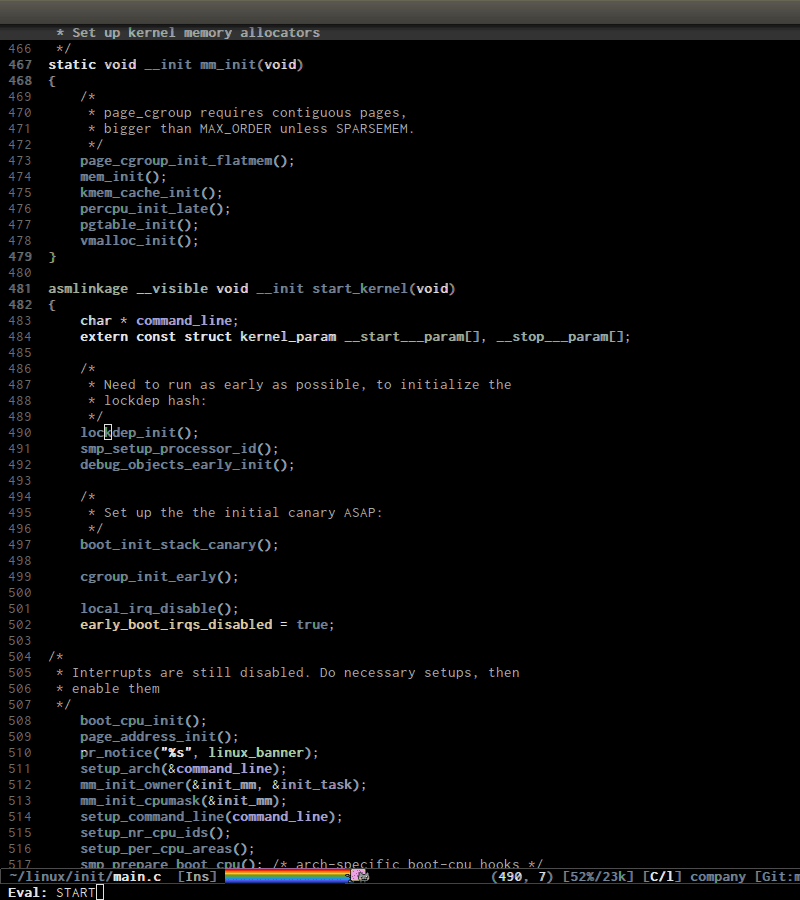
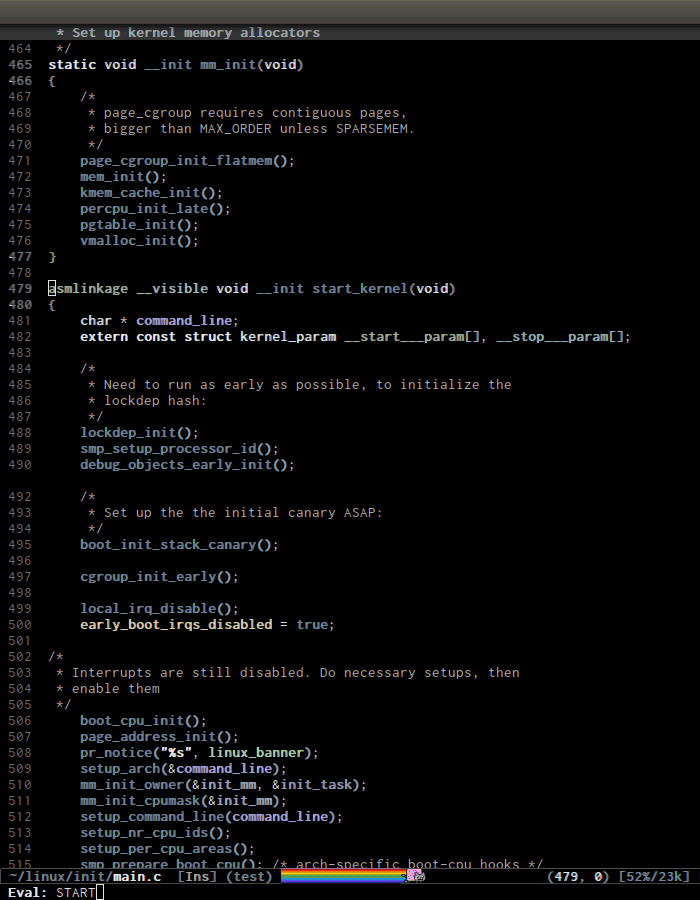
- Jump around Linux kernel source with ease using
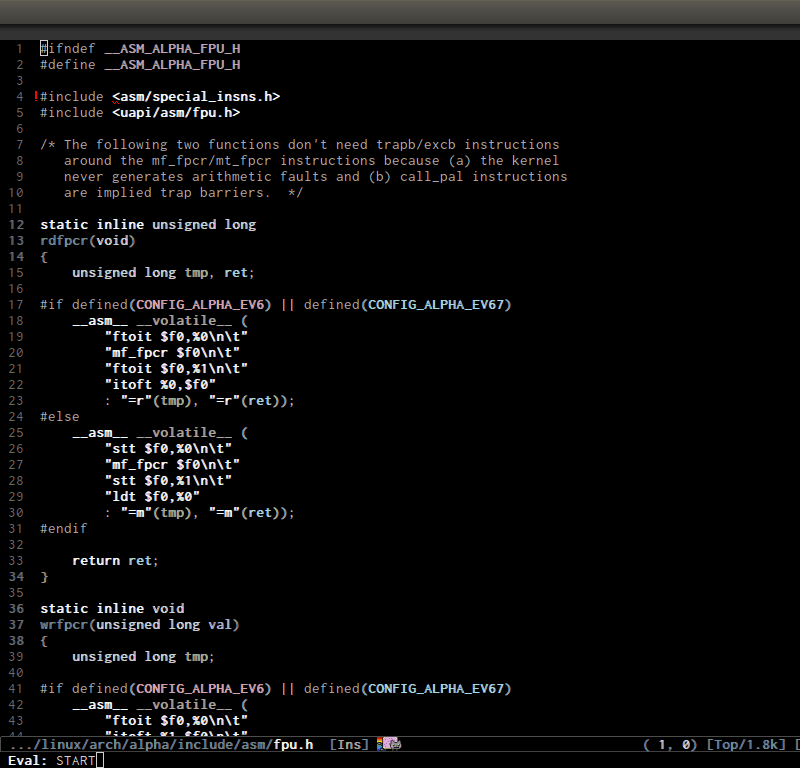
helm-gtags. The demo begins when "START" appears at the bottom:
Interactive outline tree using
moo-jump-localfrom function-args package:
- Static outline tree as a file browser:
- Symbol references:
- Code completion 1:
- Code completion 2:
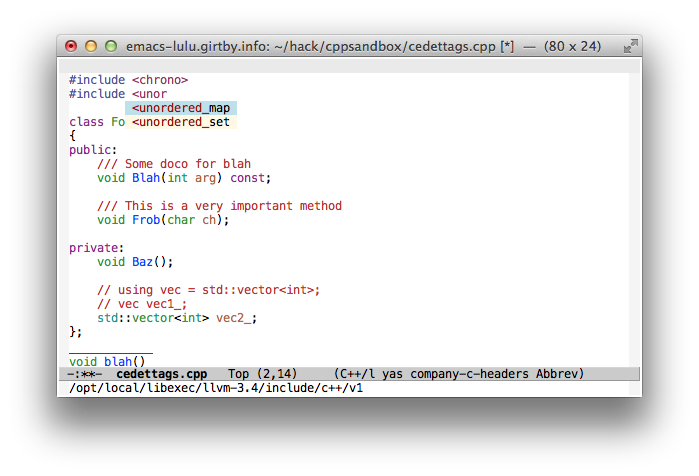
- Header completion:
- Show function interface and variable definition at the bottom:

- Show current function your cursor is inside at the top:
- Compilation support:

- Beautiful compile output:
- Fancy GDB debugging:
- Getting man pages for symbol at cursor:
Quick setup
I've prepared an Emacs repository that is properly configured for demonstration purposes. You can clone it and play with it without having to manually copy and paste all the setup Elisp code throughout the guide. When installed and run the first time, the demo repository will download from melpa, install, and compile all the packages it needs. Note that depending on your internet connection and processor speeds, this may take a while.
Install GNU Global from your distribution's package manager (Linux / Mac) or from the Win32 port (Windows). If none is available, download the sources here and manually build the package.
Backup your
~/.emacs.delsewhere.If emacs is not already running, start it.
Update your melpa database:
M-x package-list-packagesClone the repository into your ~/.emacs.d folder.
git clone https://github.com/tuhdo/emacs-c-ide-demo.git ~/.emacs.d
You may possibly want to edit your new
~/.emacs.d/init.elfile for two options.The demo repository can use either
helm-gtags(the default), orggtags. If you want to useggtags, comment this line ininit.el:And uncomment this line:(require 'setup-helm-gtags)
;; (require 'setup-ggtags)
The demo uses Helm. If you're not already familiar with Helm, read my guide. If you don't want to use Helm, also comment this line in
init.el:(require 'setup-helm)
That does it! To start using the demo, just type M-x load-file RET init.el. Continue reading this guide for its operational directions, without needing to bother to perform any more installations or elisp evaluations.
Source code navigation
Prerequisite:
- Know how to use
package.eland MELPA. If you don't know how to use, read the guide How to use Emacs package manager. Install GNU Global from your distribution's package manager (Linux / Mac) or from the Win32 port (Windows). If none is available, download the sources here and manually build the package. Do be aware that it is remotely possible that your package manager might install an outdated version that might impair some functionality of helm-gtags.
- Install ggtags. After installing
ggtagsfrom MELPA, add this code snippet to setupggtagsand key bindings:
(require 'ggtags)
(add-hook 'c-mode-common-hook
          (lambda ()
            (when (derived-mode-p 'c-mode 'c++-mode 'java-mode 'asm-mode)
              (ggtags-mode 1))))

(define-key ggtags-mode-map (kbd "C-c g s") 'ggtags-find-other-symbol)
(define-key ggtags-mode-map (kbd "C-c g h") 'ggtags-view-tag-history)
(define-key ggtags-mode-map (kbd "C-c g r") 'ggtags-find-reference)
(define-key ggtags-mode-map (kbd "C-c g f") 'ggtags-find-file)
(define-key ggtags-mode-map (kbd "C-c g c") 'ggtags-create-tags)
(define-key ggtags-mode-map (kbd "C-c g u") 'ggtags-update-tags)

(define-key ggtags-mode-map (kbd "M-,") 'pop-tag-mark)
- Or, helm + helm-gtags. Helm is awesome and if you are going to use
Helm, please read the Helm guide. Remember to setup
Helmbefore usinghelm-gtags. You can use this sample configuration. When includes the above file in your~/.emacs.d, remember to add(require 'setup-helm)to yourinit.el.
(setq
 helm-gtags-ignore-case t
 helm-gtags-auto-update t
 helm-gtags-use-input-at-cursor t
 helm-gtags-pulse-at-cursor t
 helm-gtags-prefix-key "\C-cg"
 helm-gtags-suggested-key-mapping t
 )

(require 'helm-gtags)
;; Enable helm-gtags-mode
(add-hook 'dired-mode-hook 'helm-gtags-mode)
(add-hook 'eshell-mode-hook 'helm-gtags-mode)
(add-hook 'c-mode-hook 'helm-gtags-mode)
(add-hook 'c++-mode-hook 'helm-gtags-mode)
(add-hook 'asm-mode-hook 'helm-gtags-mode)

(define-key helm-gtags-mode-map (kbd "C-c g a") 'helm-gtags-tags-in-this-function)
(define-key helm-gtags-mode-map (kbd "C-j") 'helm-gtags-select)
(define-key helm-gtags-mode-map (kbd "M-.") 'helm-gtags-dwim)
(define-key helm-gtags-mode-map (kbd "M-,") 'helm-gtags-pop-stack)
(define-key helm-gtags-mode-map (kbd "C-c <") 'helm-gtags-previous-history)
(define-key helm-gtags-mode-map (kbd "C-c >") 'helm-gtags-next-history)
Before using the ggtags or helm-gtags, remember to create a GTAGS
database by running gtags at your project root in terminal:
$ cd /path/to/project/root
$ gtags
After this, a few files are created:
$ ls G*
GPATH   GRTAGS  GTAGS
- GTAGS: definition database
- GRTAGS: reference database
- GPATH: path name database
If you use ggtags, you have a command for creating GTAGS database,
that is ggtags-create-tags; this is recommended way when using
ggtags, to let it know where the project root is.
Basic movements
C-M-f runs
forward-sexp, move forward over a balanced expression that can be a pair or a symbol. Demo:
C-M-b runs
backward-sexp, move backward over a balanced expression that can be a pair or a symbol. Demo:
C-M-k runs
kill-sexp, kill balanced expression forward that can be a pair or a symbol. Demo:
C-M-<SPC> or C-M-@ runs
mark-sexp, put mark after following expression that can be a pair or a symbol. Demo: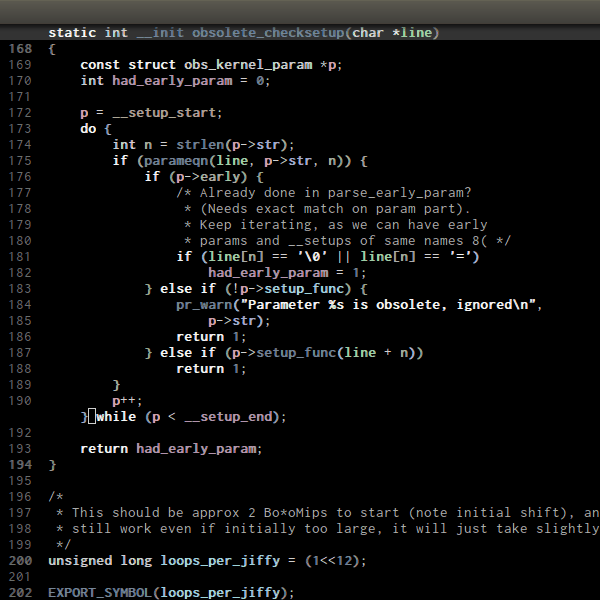
C-M-a runs
beginning-of-defun, which moves point to beginning of a function. Demo: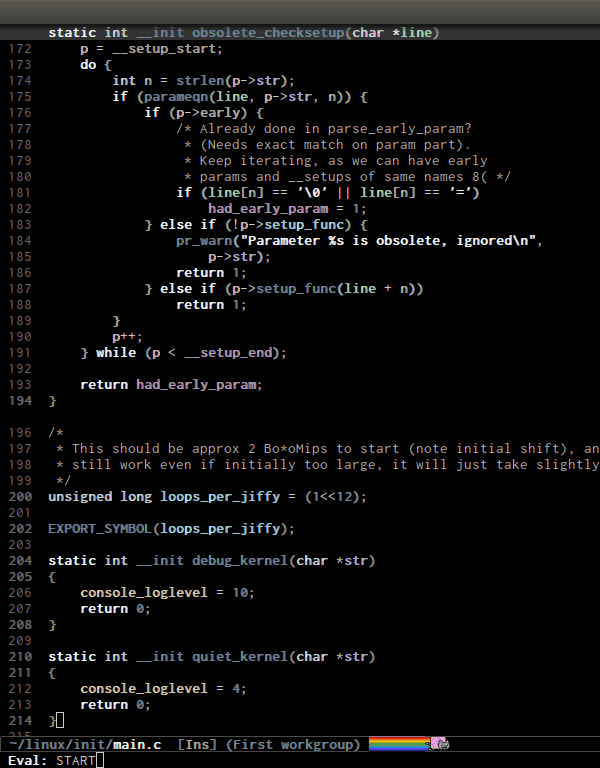
C-M-e runs
end-of-defun, which moves point to end of a function. Demo:
C-M-h runs
mark-defun, which put a region around whole current or following function. Demo:
Basic concepts of tag
A tag is a name of an entity in source code. An entity can be a variable, a method definition, an include-operator… A tag contains information such as name of the tag (the name of the variable, class, method), location of this tag in source code and which file it belongs to. As an example, GNU Global generates three tag databases:
- GTAGS: definition database
- GRTAGS: reference database
- GPATH: path name database
A definition of a tag is where a tag is implemented. For example, a function definition is the body where it is actually implemented, or a variable definition is where the type and its property (i.e static) is specified.
A reference of a tag is where a tag is used in a source tree, but not where it is defined.
Find definitions in current buffer
The Imenu facility offers a way to find the major definitions, such as
function definitions, variable definitions in a file by name. ggtags
can integrate Imenu:
(setq-local imenu-create-index-function #'ggtags-build-imenu-index)
If you use Helm, use moo-jump-local from function-args package. You
can use it as an outline tree like in other IDEs. Here is a demo:
Find definitions in project
- Using
gtags: by default,M-.runsggtags-find-tag-dwimwhenggtags-modeis enabled. The commandggtags-find-tag-dwimjump to tag base on context:- If the tag at point is a definition,
ggtagsjumps to a reference. If there is more than one reference, it displays a list of references. - If the tag at point is a reference,
ggtagsjumps to tag definition. - If the tag at point is an include header, it jumps to that header.
- If the tag at point is a definition,
You can jump back to original location where you invoked
ggtags-find-tag-dwim by M-,, which runs pop-tag-mark (if you
follow my key bindings).
You can also find arbitrary tag definition when invoking M-. on
blank space. A prompt asks you for tag pattern, which is a regexp.
If ggtags gives you a list of candidates, you can use M-n to move
to next candidate and M-p to move back previous candidate. Use M-g
s to invoke Isearch on candidate buffer list.
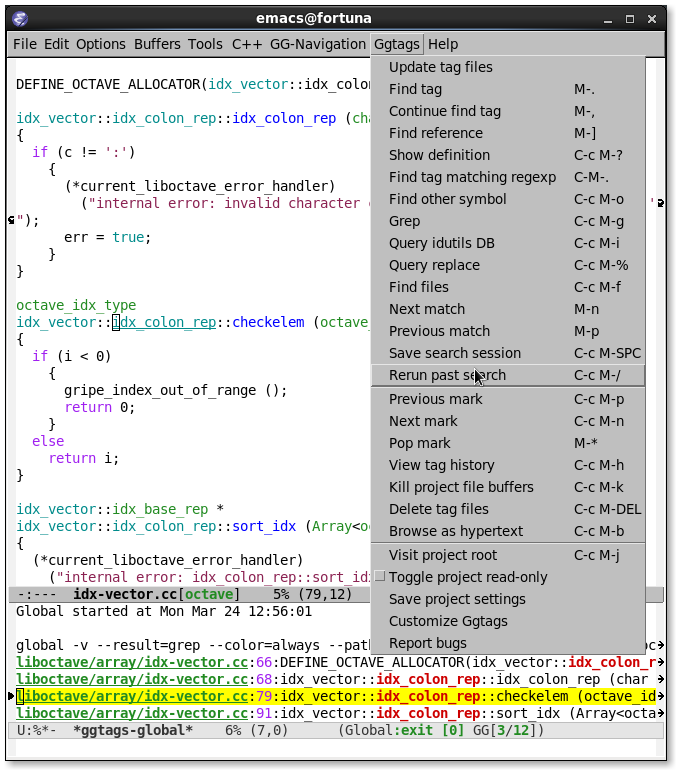
(screenshot taken from ggtags)
- Using
helm-gtags: If key bindings are properly setup as above,M-.runshelm-gtags-dwim, which behaves the same asggtags-find-tag-dwim. Similarly, you jump back to original location by usingM-,, which runstags-loop-continue(Emacs default).
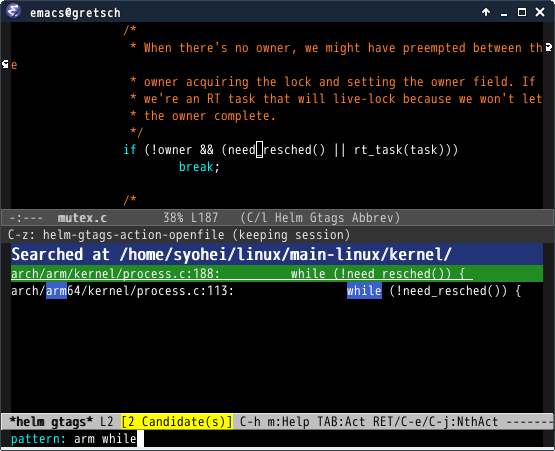
(screenshot taken from helm-gtags)
You can also find arbitrary tag definition when invoking M-. on
blank space. A prompt asks you for tag pattern, which is a
regexp.
helm-gtags provides a really nice feature that uses Helm to display
all available tags in a project and incrementally filtering, and is really
fast using helm-gtags-select, which is bound to C-j in my setup
above. This is useful when you want to explore tags in unfamiliar
project. Demo:
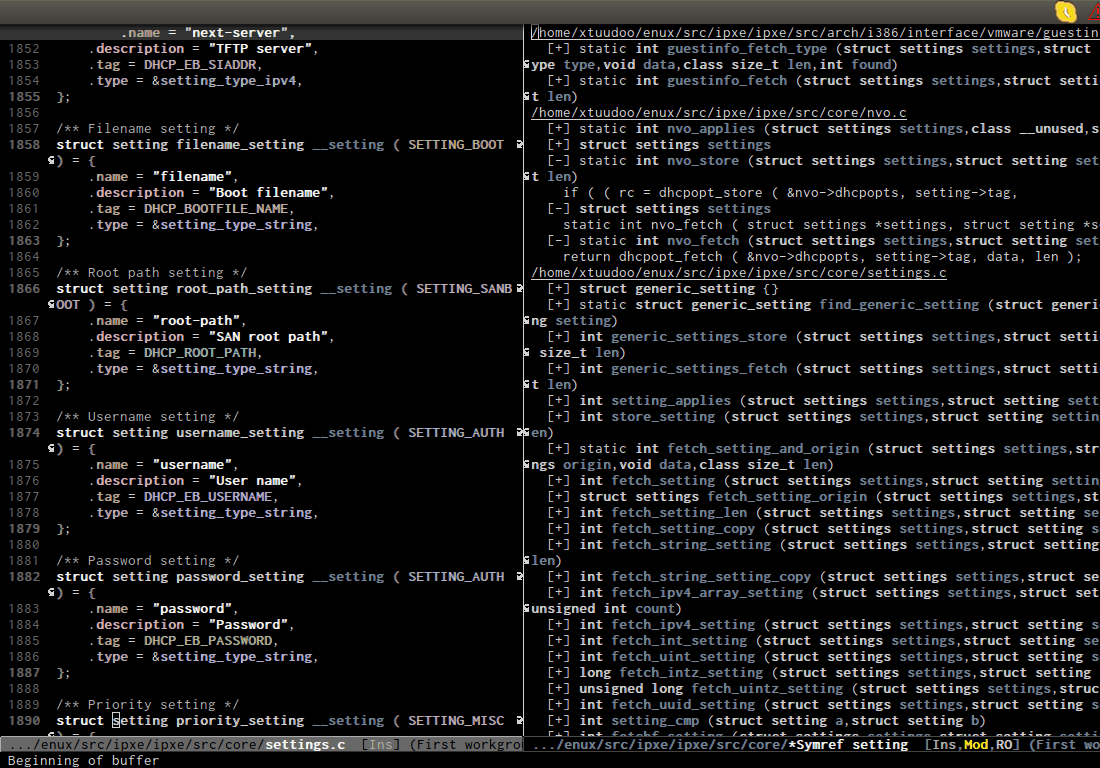
Find references in project
- Using
ggtags: Either runggtags-find-tag-dwimorggtags-find-reference, which only finds references. - Using
helm-gtags: Either runhelm-gtags-dwimorhelm-gtags-find-rtags, bound to C-c g r, which only finds references. Note that forhelm-gtags-find-rtags:- if point is inside a function, the prompt will be default to the function name.
- If point is on a function, it lists references of that functions immediately.
- If point is on a variable,
helm-gtags-find-rtagswon't have any effect. You should usehelm-gtags-find-symbol, which is bound to C-c g s.
Find functions that calls function is actually a special case of finding references. That is, you gather references for a function.
Find functions that current functions call
If you want to list all the functions that the current function - the
function that point is inside - calls, you can do that with
helm-gtags-tags-in-this-function, which is bound to C-c g a in my
setup.
Find files in project
- Using
ggtags: Runggtags-find-fileto find a file from all the files indexed. If point is on an included header file,ggtags-find-tag-dwimautomatically jumps to the file. - Using
helm-gtags: Runhelm-gtags-find-filesto find files matching regexp. If point is on an included header file,helm-gtags-dwimautomatically jumps to the file.
Alternatively, you have a more generic solution, that is using Projectile. Projectile is a generic project management tool that you learn later. With Projectile, jumping around version controlled project like Linux kernel is a breeze, since you can jump to any file regardless of where you are standing in the project.
View visited tags with tag stack
- Using
ggtags: As you know that you can jump back withpop-tag-mark(bound toM-,), you can also view a list of visited tags usingggtags-view-tag-history, which is bound toC-c g h. It displays visited tags from newest to oldest, that is from top to bottom. - Using
helm-gtags: Similarly,helm-gtagsalso has the commandhelm-gtags-show-stackthat shows visited tags from newest to oldest, from top to bottom.
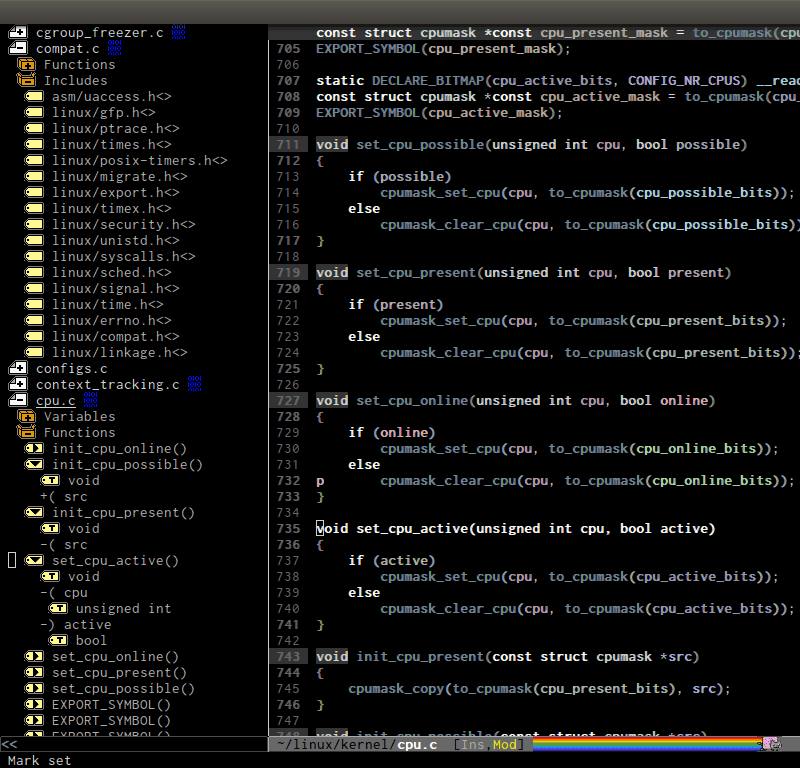
Browse source tree with Speedbar file browser
If you want a static outline tree, Emacs also has a more one:
Speedbar. To use Speed bar, M-x speedbar and a frame that contains
a directory tree appear. In this directory, to the left of a file or
directory name is an icon with + sign in it. You can click the icon
to open the content of a node. If the node is a file, the children of
the files are tags (variable and function definitions) of the file; if
the node is a directory, the children of the node are files in that
directory. One important thing to remember, Speedbar only lists files
that match speedbar-file-regexp, that contains the extensions for
common programming languages. If you don't see files in your
programming languages listed, consider adding it the regexp list.
Basic usage:
- Use SPC to open the children of a node.
- RET to open the node in another window. If node is a file, open that file; if node is a directory, enter that directory; if node is a tag in a file, jump to the location of that tag in the file.
- U to go up parent directory.
- n or p moves to next or previous node.
- M-n or M-p moves to next or previous node at the current level.
- b switches to buffer list using Speedbar presentation. You can also open children of each buffer.
- f switches back to file list.
To enable speedbar to show all files:
(setq speedbar-show-unknown-files t)
Package: sr-speedbar
However, you may feel that a frame is difficult to use. To solve this
issue, you need sr-speedbar, which can be installed via
MELPA.
- To open
sr-speedbar, execute the commandsr-speedbar-openorsr-speedbar-toggle. - To close
sr-speedbar, execute the commandsr-speedbar-closeorsr-speedbar-toggleagain.
Best is to use sr-speedbar-toggle only, for simplicity.
sr-speedbar gives the following improvements:
- Automatically switches directory tree - when you switch buffer - to
the
default-directoryof current buffer. - Use an Emacs window instead of frame, make it easier to use.
- C-x 1 deletes every window except Speedbar, so you won't have to open again.
- You can prevent C-x o to jump to
sr-speedbarwindow by settingsr-speedbar-skip-other-window-pto `t`. You can still move tosr-speedbarwindow using either the mouse or windmove.
Demo: In the demo, you can see that the function set-cpu-active is
being highlighted. That's what happens when you press RET on a tag:
Speedbar moves to the location of that tag and highlight it. Looking
at the Speedbar, under set-cpu-active node, it contains these
children:
- The first child is always the return type,
void. - The subsequent children are function parameters. Inside each function parameter node is its type.
General completion with company-mode
company-mode is a text completion framework for Emacs. The name
stands for "complete anything". It uses pluggable back-ends and
front-ends to retrieve and display completion candidates.
It comes with several back-ends such as Elisp, Clang, Semantic, Eclim, Ropemacs, Ispell, CMake, BBDB, Yasnippet, dabbrev, etags, gtags, files, keywords and a few others.
After installing company-mode from MELPA, activate it globally:
(require 'company)
(add-hook 'after-init-hook 'global-company-mode)
General Usage: Completion will start automatically after you type a few letters. Use M-n and M-p to select, <return> to complete or <tab> to complete the common part. Search through the completions with C-s, C-r and C-o. Press M-(digit) to quickly complete with one of the first 10 candidates. When the completion candidates are shown, press <f1> to display the documentation for the selected candidate, or C-w to see its source. Not all back-ends support this.
The variable company-backends specifies a list of backends that
company-mode uses to retrieves completion candidates for you.
That's the basic. In the later sections, you will configure
company-mode to provide completion candidates.
Demo project
I uploaded a demo project for you to play with completion feature here. The project has this structure:
project_root/
            Makefile
            src/
                main.c
                lib.c
                lib2.c
                feature1/
                    feature1.c
            include1/
                lib.h
                feature1/
                    feature1.h
            include2/
                lib2.h
For the .h files, all have this content:
void filename_func1();
int filename_func2(int a, int b);
For .c files, except for main.c, all have this template:
#include "filename.h"

void filename_func1() { }

int filename_func2(int a, int b) { }
filename or FILENAME is actual filename like lib1, lib2…
The files look silly but good enough for our learning purpose.
Source code completion using Clang
To use company-mode with Clang, add this configuration:
(setq company-backends (delete 'company-semantic company-backends))
(define-key c-mode-map  [(tab)] 'company-complete)
(define-key c++-mode-map  [(tab)] 'company-complete)
You have two commands for completing C/C++ code:
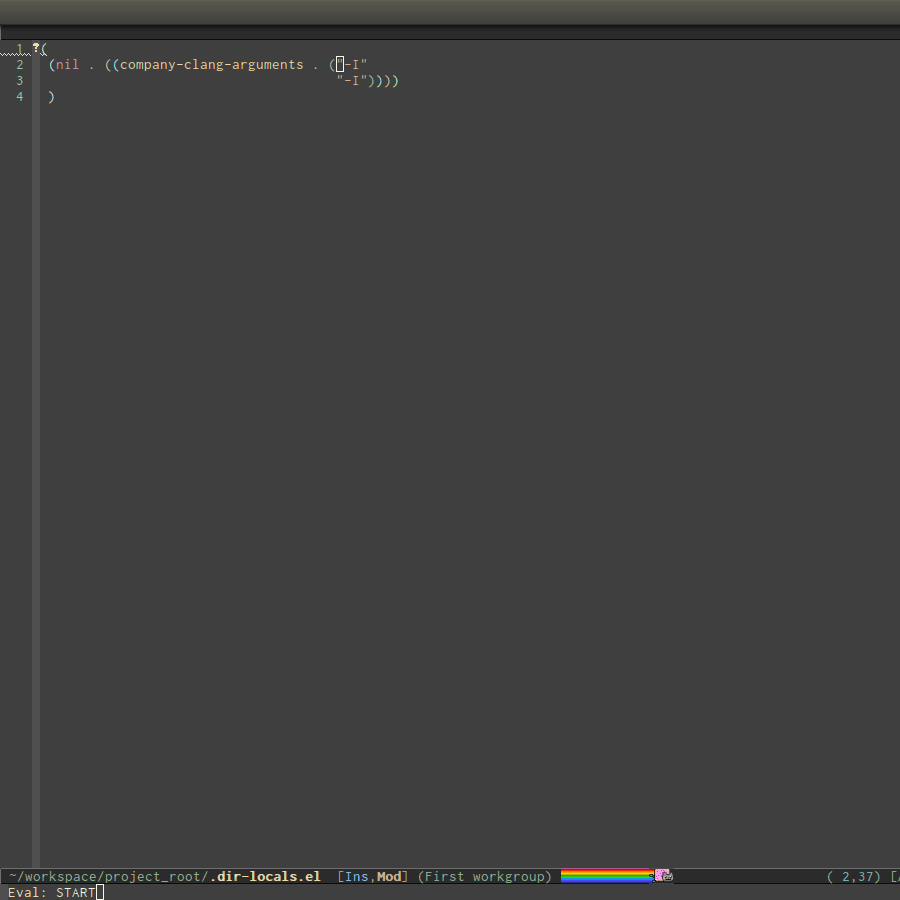
company-clang: useclangto retrieve completion candidates. You will have completion with system header files, but not your project. By default,company-completealready includescompany-clangbackend, so you can usecompany-completeto complete for many thing. Note that in the configuration forcompany-modeabove, we have to deletecompany-semantic, otherwisecompany-completewill usecompany-semanticinstead ofcompany-clang, because it has higher precedence incompany-backends.company-semanticwill be discuss in the CEDET section.To retrieve completion candidates for your projects, you will have to tell Clang where your include paths are. Create a file named
.dir-locals.elat your project root:((nil . ((company-clang-arguments . ("-I/home/<user>/project_root/include1/" "-I/home/<user>/project_root/include2/")))))
If you put a file with a special name .dir-locals.el in a directory,
Emacs will read it when it visits any file in that directory or any of
its subdirectories, and apply the settings it specifies to the file’s
buffer. If you want to know more, read GNU Emacs Manual -
Per-Directory Local Variables. If you use Helm, you can easily insert
absolute path by C-c i at the current path in helm-find-files
(bound to C-x C-f by default in my demo .emacs.d at the beginning):
In the above example, nil means apply the settings to any file or
sub-directory visited. If non-nil, you have to specify a major mode
and the settings are applied to major modes only. You set
company-clang to c-mode and c++-mode anyway, so there's no
problem setting major mode to nil. The remaining is a key-value pair
of variable and value of that variable. company-clang-arguments is
where you can tell include paths, and it takes a list of strings of
include paths, as you can see above. After that, company-clang can
see include paths in your project. If you add something new, like an
include path, to your .dir-locals.el and is editing some source
file, reopen the file for the new values to take effect.
company-gtags: use GTAGS database fromGNU Globalto retrieve completion candidates. It displays ALL completion candidates in GTAGS database regarding of scope. Usecompany-gtagsto provide code completion in your current project.
Exercise:
- Create a
.dir-locals.elatproject_root. Add this Emacs Lisp code:
((nil . ((company-clang-arguments . ("-I/home/<user>/project_root/include1/"
                                     "-I/home/<user>/project_root/include2/")))))
Replace <user> with your username.
- Enter any source file and start completion. You will see that
company-clangcorrectly retrieves completion candidates in those directories.
Header file completion with company-c-headers package
company-c-headers provides auto-completion for C/C++ headers using Company. After installing from MELPA, set it up:
(add-to-list 'company-backends 'company-c-headers)
IMPORTANT: If you want to complete C++ header files, you have to
add its paths since by default company-c-headers only includes these
two system include paths: /usr/include/ and
/usr/local/include/. To enable C++ header completion for standard
libraries, you have to add its path, for example, like this:
(add-to-list 'company-c-headers-path-system "/usr/include/c++/4.8/")
After that, you can complete C++ header files. To complete project
local, use company-c-headers-path-user and put it in
.dir-locals.el.
CEDET
What is CEDET?
CEDET is a (C)ollection of (E)macs (D)evelopment (E)nvironment (T)ools written with the end goal of creating an advanced development environment in Emacs. CEDET includes common features such as intelligent completion, source code navigation, project management, code generation with templates . CEDET also provides a framework for working with programming languages; support for new programming languages can be added and use CEDET to provide IDE-like features.
CEDET can give you code completion, but this process takes time and can block your Emacs while it is doing so. If you have large project, you may not want to use CEDET for code completion. But, you can use CEDET perfectly for utilities that work at file scope i.e. refactoring local variables in a function in a file.
Why use CEDET?
CEDET is simple to setup and portable (right winthin Emacs and written entirely with Emacs Lisp). Without CEDET, you have to use external tools and third party Emacs packages. The downside of external tools is that they are not specifically designed for Emacs. They have similar use cases, but not always satisfying. For example, source code indexing tools such as GNU Global and Exuberant Ctags are really good at working static source code, but they do not keep track changes in real time; CEDET does:
As you can see, CEDET recognizes when printk.h is included and
provides appropriate completion candidates. In contrast, non-context
sentisve completion is like this:
In this case, the completion system gets all candidates straight from GNU Global generated database without considering current context.
The disadvantage is that CEDET is written in Emacs Lisp, and it is bound to the performance limitations of Emacs. Even though, CEDET is still really fast for moderate-size source files. CEDET also makes use of external tools like GNU Global or Cscope or Exuberant Ctags for finding symbol references/definition in a project to reduce its workload.
Installation
CEDET was merged into Emacs since 23.2. You do not need to install CEDET manually. However, you can also use the development repository that contains latest bug fixes and more features. Nevertheless, the built-in Emacs is still adequate for daily usage and convenient for trying out before actually cloning and use the development version. Skip this section if you only want to try Emacs. Come back later if you really like it.
If you really want to use the development version with latest feature, checkout this branch:
git clone http://git.code.sf.net/p/cedet/git cedet
Be sure to place the checked out cedet directory in your
~/.emacs.d. Then compile it:
cd cedet
make # wait for it to complete
cd contrib
make
Finally, assume that you placed your newly cloned CEDET in
~/.emacs.d, load it into your Emacs:
(load-file (concat user-emacs-directory "/cedet/cedet-devel-load.el"))
(load-file (concat user-emacs-directory "cedet/contrib/cedet-contrib-load.el"))
Semantic minor modes
Semantic is a package that provides language-aware editing commands
based on source code parsers. Parsing is a process of analyzing source
code based on programming language syntax. Emacs understands your
source code through this process to provides features such as
contextual code completion, code navigation. Here is an example how
Semantic helps you provides completion for Boost:
- Setup Semantic
To enable code completion using Semantic, add the following code:
(require 'cc-mode)
(require 'semantic)

(global-semanticdb-minor-mode 1)
(global-semantic-idle-scheduler-mode 1)

(semantic-mode 1)
- Command:
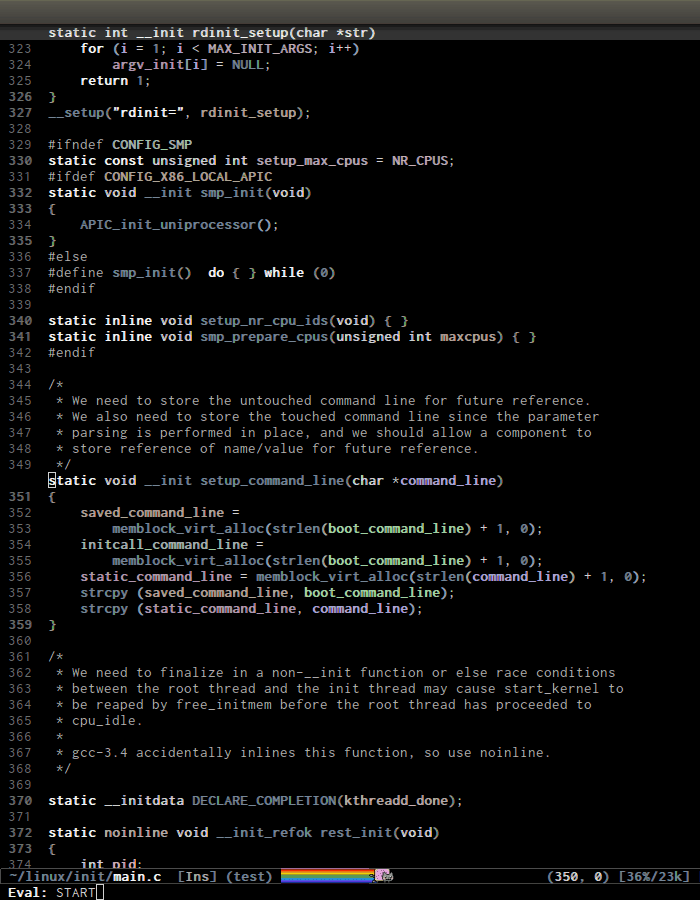
semantic-modeThis command activates
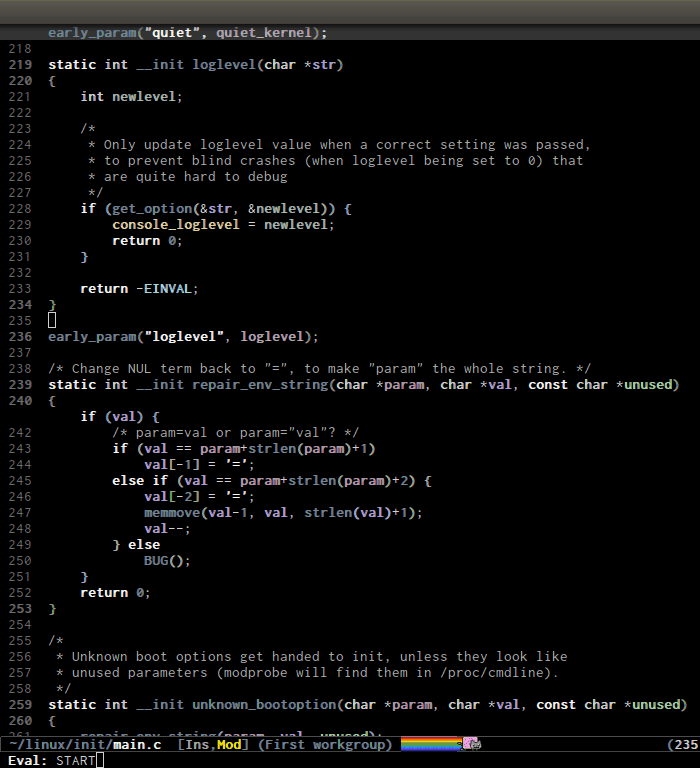
semantic-mode. In Semantic mode, Emacs parses the buffers you visit for their semantic content. The parsing looks like this:
Notice that at the bottom, Emacs prints messages like this:
Parsing
<file> (LL)...<progress in percentage>
. This is common behavior ofSemantic: when you perform a jump to a symbol or perform a completion,Semantictries to be accurate by parsing all the included files and all the included files in the included files and so on, until it reaches the end:You may worry that this process takes a long time. Sometimes, it does. However, this is just a one time process. Once it is parsed, Semantic will cache the parsing result for future use. The next time you perform some action on the parsed code, such as code completion, you will get your desired output instantly.
- Command:
global-semanticdb-minor-modeAs mentioned above, Semantic caches parsing result for future use. To do that,
semanticdb-minor-modemust be activated. In Semantic DB mode, Semantic parsers store results in a database, which can be saved for future Emacs sessions. The cache is saved in directory specified bysemanticdb-default-save-directoryvariable. The default directory is~/.emacs.d/semanticdb. - Command:
global-semantic-idle-scheduler-modeWhen
semantic-idle-scheduler-modeis enabled, Emacs periodically checks to see if the buffer is out of date, and reparses while the user is idle (not typing). When this mode is off, a buffer is only reparsed when user explicitly issue some command.With
semantic-idle-scheduler-mode, Emacs keeps track live changes of your source code. - Add more system include paths
By default, Semantic automatically includes some default system include paths such as
/usr/include,/usr/local/include… You can view the list of include paths insemantic-dependency-system-include-path. To add more include paths, for example Boost include paths, use the functionsemantic-add-system-includelike this:(semantic-add-system-include "/usr/include/boost" 'c++-mode) (semantic-add-system-include "~/linux/kernel") (semantic-add-system-include "~/linux/include")
If you want the system include paths to be available on both C/C++ modes, then ignore the optional mode argument in
semantic-add-system-include. - Completion using
company-modecompany-modeprovides a command calledcompany-semanticthat uses SemanticDB to retrieve completion candidates. Function interface of each candidate is shown in the minibuffer. One nice thing ofcompany-semanticis that it fixed an issue of original Semantic completionsemantic-ia-complete-symbol: it can show you completions even if there's no prefix. The originalsemantic-ia-complete-symbolrequires to have at least one character as a prefix for finding completions.
CEDET can do more
This guide only covers a portion of CEDET. Since Semantic parses source code and creates a database for code completion, it would be useful to reuse the database for other features such as code navigation, jump to definition and gather references. These are cool features. For example, CEDET provide nice syntax highlighting for gathering references:
The above feature is called Semantic Symref. It queries tag references from SemanticDB and display the result in another buffer. Please refer to GNU Manual - Symbol References for more info. If your project is only the size of Emacs or similar, then Semantic Symref is a viable choice. Remember that when entering new files, Semantic takes time to parse and if you gather references for the first time, you will have to wait for a while for Semantic doing its job. After the first time, subsequent uses of Semantic Symref happens instantly.
But, for navigating around the source tree, we already have ggtags
and helm-gtags, which uses GNU Global for much faster indexing for
large project like Linux kernel. The only thing that other tools
cannot do, is context-sensitive completion. That's why we only use
CEDET for code completion in this guide. Nevertheless, Semantic Symref
is still a viable choice for small to medium sized projects. Choose
the one you prefer.
Other solutions that use clang is quite good but not there yet. For
example, auto-complete-clang is fine for getting system header
candidates (since clang has system paths by default), but it has no
concept of project and is not aware of project include path. You can
add more arbitrary include paths to auto-complete-clang, but it won't
be pretty: once you add an include path for a project, it is visible
to all other projects since the include path is treat as system
include path. That means, whenever you try to complete something, you
get irrelevant candidates from other projects as well. Quite
annoying. company-clang also has the same problem. Another solution
is rtags, but it is really complicated to setup, especially if you use
make; I never succeed with it. clang based packages still have a
long way to go. CEDET also supports clang for retrieving completion
candidates. It also has the limitations of other packages.
CEDET is best used with new project, because Semantic parse code as you write. As a result, you won't have to wait for parsing unknown source files to get completion candidates.
Source code navigation using Senator
Senator is a part of CEDET. Senator stands for SEmantic
NAvigaTOR. Senator provides some useful commands for operating on
semantic tags in SemanticDB. As you can see, another utility makes
use of SemanticDB, aside from smart completion. It is like the heart
of CEDET: once Semantic fails to parse, tools centered around it fail
as well. If such situation happens, you always have a reserved and
simpler solution: use GNU Global with ggtags or helm-gtags
frontends. The following commands are provided by Senator:
Navigation
Senator provides commands for navigating by tag.
- C-c , n runs
senator-next-tag, navigate to the next Semantic tag. C-c , p runs
senator-previous-tag, navigate to the previous Semantic tag.Here is how both of those commands work:
As you see,the C macro (in the screenshot, its
DECLARE_COMPLETION) is not considered a tag.senator-jump(only available in CEDET bzr), specify a tag to jump to. TAB for a list of available Semantic tags in current buffer, similar to TAB in M-x in stock Emacs. If you use Helm, usemoo-jump-localfrom the packagefunction-argsinstead.Demo (
helm-modeis disabled):
C-c , u runs
senator-go-to-up-reference, move up one reference level from current tag. An upper reference level of a tag is the source that defines the tag or includes the tag. This is incredibly useful when you want to jump from a function declaration in a class to its definition, or jump to the class that a function belongs to, quickly.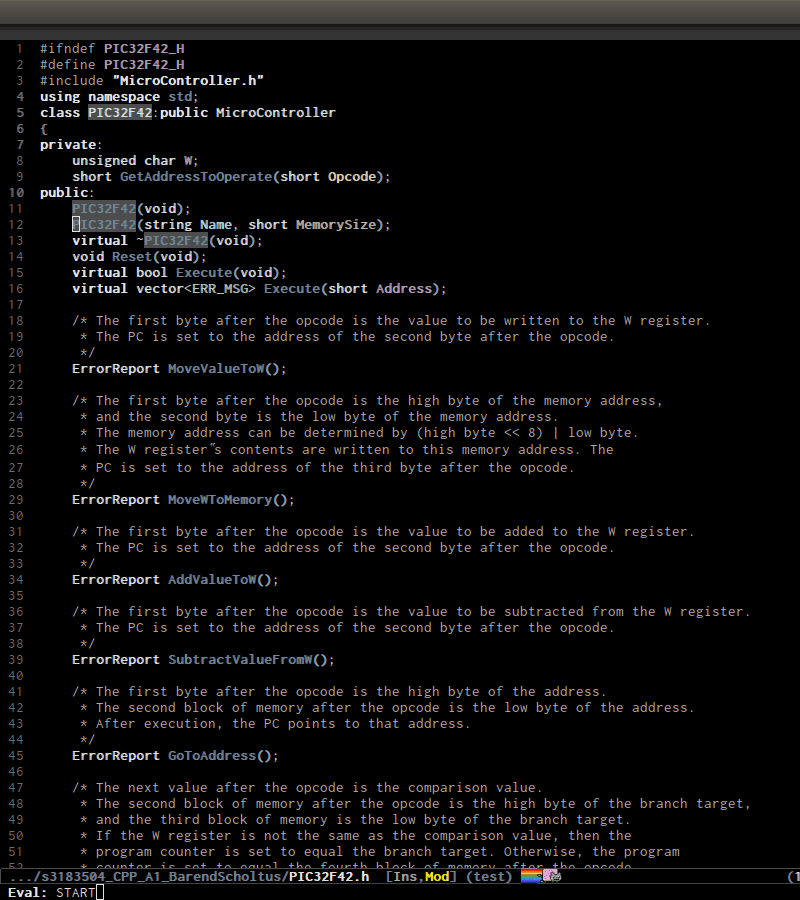
In the demo, I only use
senator-go-to-up-referenceto switch from a declaration, that isPIC32F42(string Name, short MemorySize);inPIC32F42.hto its implementation inPIC32F42.c. C-c , u again, point jump is on the classPIC32F42, which is the class that the function belongs. ClassPIC32F42has its parent classMicrocontrller, and I run C-c , u again to move point toMicrocontrllerclass. At this point, I cannot move further.
Semantic also provides a useful command for finding all references of
a tag, that is semantic-symref, as demonstrated in previous
section. On a symbol, C-c , g and a prompt appear asking for a tag
for gathering references, with the default is the symbol at
point. Leave prompt blank and RET to use the default or enter
another symbol if you change your mind.
Copy/Paste
C-c , M-wrunssenator-copy-tag, take the current tag, and place it in the tag ring.C-c , C-wrunssenator-kill-tag, take the current tag, place it in the tag ring, and kill it. Killing the tag removes the text for that tag, and places it into the kill ring. Retrieve that text with C-y.The above commands are basically like normal
M-wandC-w, but are used for tags. For example, runC-c , C-wwith point inside a function definition kills the whole function body and its interface, or you can kill function parameters, and can be yanked back with C-y: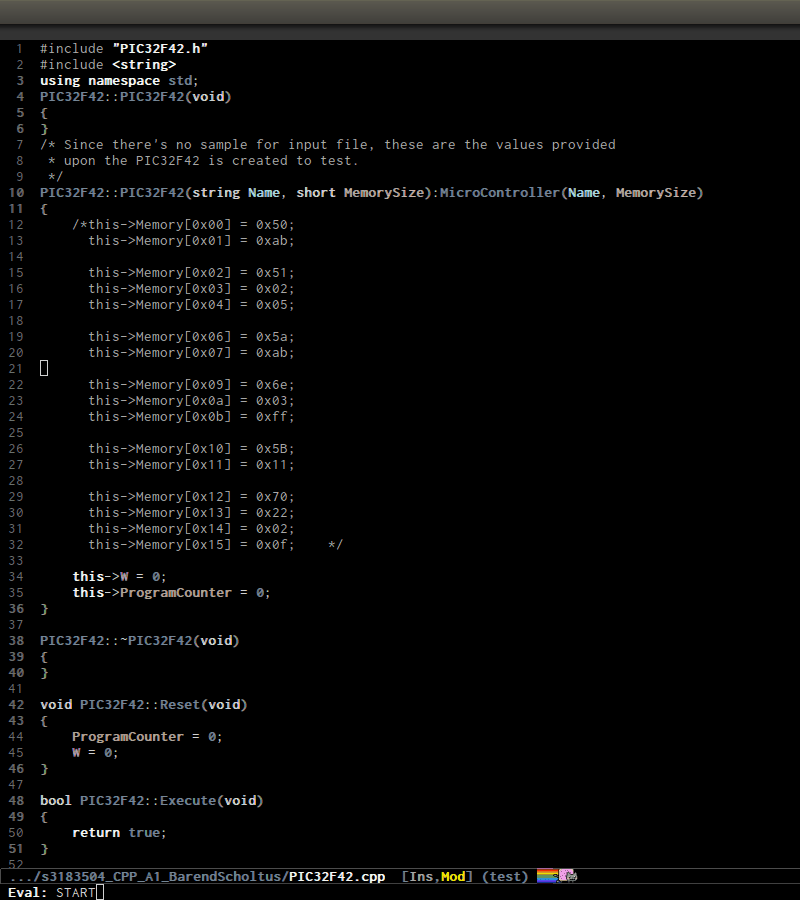
As you see, the function body and its interface is killed and yanked back with C-y. You can also see that the function parameter, aside from its name, its type is also removed when the command is executed.
C-c , C-yrunssenator-yank-tag, yank a tag from the tag ring. The form the tag takes is different depending on where it is being yanked to. For example, in previous example withC-c , C-w, when you run C-y, it yanks the whole thing including function interface and its body. C-c , C-y only yanks the function interface.
C-c , rrunssenator-copy-tag-to-register, copy the current tag into a register. With prefix argument will delete the text of the tag to the kill ring.
Obsolete commands
Senator also provides commands for code completion:
senator-complete-symbol and senator-completion-menu-popup. Code
completion provided by Senator is simpler than the actual completion
provided by semantic-ia-complete-symbol command that is used by
moo-complete for a list of candidates with full information, such as
complete function interface is displayed correctly. These two
completion commands are provided.
(Optional) Project management with EDE
EDE, short for Emacs Development Environment, is a generic interface for managing projects. In EDE, a project hierarchy matches a directory hierarchy. The project's topmost directory is called the project root, and its subdirectories are sub-projects.
EDE can do many things but we will just use it for code completion at project level. To demonstrate the use of EDE, we will create a little project of our own.
To setup EDE:
(require 'ede)
(global-ede-mode)
Now, let's try completion in main.c using moo-complete or
company-semantic. Nothing also happens. It is because Semantic only
looks for header files in current directory by default. If you put it
elsewhere, you have to tell Semantic where it is. This is not limited
to only Semantic; you have to specify project include path in Eclipse
as well.
- Create a new file called
cedet-projects.elin~/.emacs.d/. - In this file, add a new
ede-cpp-root-projectin this form:
(ede-cpp-root-project "project_root"
                      :file "/dir/to/project_root/Makefile")
The first argument to ede-cpp-root-project is project name. :file
argument specifies path to project root. You must create a file in the
project root, since EDE uses that file as an "anchor" to project
root; in our case, Makefile is the anchor file. Not sure why EDE
just straightly uses root directory.
- Add include directories specific to the project and in your system:
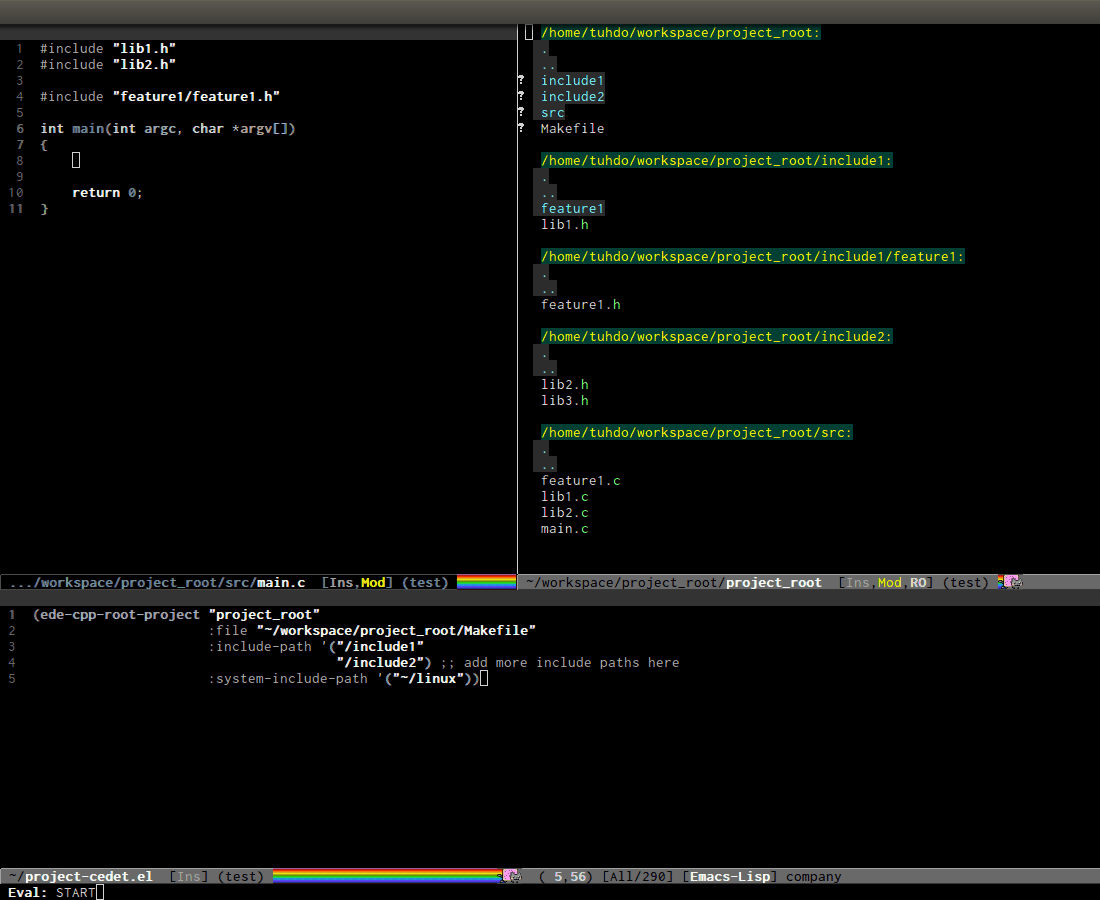
(ede-cpp-root-project "project_root"
                      :file "/dir/to/project_root/Makefile"
                      :include-path '("/include1"
                                      "/include2") ;; add more include
                      ;; paths here
                      :system-include-path '("~/linux"))
:include-path specifies directories local to your projects that EDE
should search first when looking for a header file. :incluide-path
is relative to project root specified in :file.
:system-include-path specifies system include paths that do not
belong to current project. Note that despite it is called
system-include-path, it does not have to be in place like
/usr/include. You can specify any include directories outside of
your current project as "system headers".
After done setting up your project, save the file and execute that
ede-cpp-root-project expression with C-x C-e. Now, Semantic is
aware of your project include paths. However, you have to do one last
thing: either close the file main.c and reopen it or M-x
semantic-force-refresh to tell Semantic to analyze main.c
again. Otherwise, Semantic will still keep the previous parsing result
of this file and completion candidates won't be available. As a
result, it is important to load EDE projects defined by
ede-cpp-root-project before opening any project file.
After that, try auto-completion and you will see everything is working fine again:
Summary:
- EDE, short for Emacs Development Environment, is a generic interface for managing projects.
- EDE enables Semantic to find sources and perform project level completions.
- To add a C/C++ project, simply create a project definition with this
template in a file, such as
ede-projects.el:
(ede-cpp-root-project "project_root" :file "/dir/to/project_root/Makefile" :include-path '("/include1" "/include2") ;; add more include ;; paths here :system-include-path '("~/linux"))
- Load
ede-projects.elwhen Emacs start. - If you have opening files, either close or refresh it with
M-x
semantic-force-refresh
to make Semantic aware of new changes.
Later, you will also learn another project management tool called
Projectile. You may ask, why another project management tool? The
differences are:
- EDE is older, Projectile appears recently.
- EDE manages project files to integrate with specific build system and generate corresponding build file (such as Makefile; these features are not covered in this guide). Projectile provides generic file management operations such as quickly jump to file/directory in project, list buffers that belong to current project…
- EDE is part of CEDET suite; it is geared toward Semantic. For example, we used EDE to tell Semantic where to retrieve correct include paths for current project to perform smart completion in previous section. Projectile provides a generic interface for managing your project under a VCS or some supported build system.
- Projectile is easier to learn than EDE.
Both have some overlapping in features, such as Projectile provides basic tag navigation in project, but in general they support each other. For our basic usage, we use EDE for smart completion as in previous section and Projectile to navigate our project effortlessly.
Code refactoring
You can use this package, Semantic Refactor for refactoring in small scale. The package offers the following feature:
- Context-sensitive menu offers appropriate refactoring actions
- Generate class implementation (also handles nested class and class template)
- Generate class getters and setters
- Generate function implementation (also handles function template)
- Generate function prototype
- Convert function to function pointer
- Convert function to function parameter
- Move semantic units (class, function, variable)
- Extract function with proper type information
- Precise local variable rename
Navigate system include path
Up until now we were only navigating code in a project using GNU
Global. How about jumping to system include headers? You have a few
options that I know:
Using Semantic with semantic-ia-fast-jump command
Semantic provides a jump command based on the parsed tags produced by the Semantic C/C++ parser. To jump to any code in system include path, you must first tell Semantic where it is:
(semantic-add-system-include "/usr/local/include") (semantic-add-system-include "~/linux/include")
Then, if point is on an include header like #include <iostream> or a
tag inside iostream, executing the command semantic-ia-fast-jump
will jump to into header file or jump to the tag at point earlier that
is inside iostream. If the tag is actually within iostream but you
do not include iostream, Semantic won't be able to jump because it
sees no appropriate header that contains the tag.
The function semantic-add-system-include will add your include paths
to semantic-c-dependency-system-include-path variable. By default,
it only contains /usr/include. You can add more such as
/usr/local/include or your own project, such as
~/linux/include.
The disadvantage of using Semantic is that for it may take brief while to parse, but for once; the next time you can jump to parsed source instantly.
Using generated database from GNU Global
GNU Global has an environment variable named GTAGSLIBPATH. This
variable holds GTAGS database of external libraries that your project
depends on but not inside your project. For example, your project may
rely on system headers such as stdio.h, stdlib.h… but these
headers are internal to your project. However, remember that you can
only jump to tag definitions of external dependencies, and nothing
else (such as files or references). But, again, once you are inside
the external library, you can start jumping around sicne it becomes
your current project.
To make GNU Global sees your system headers, follow these steps:
- Export this environment variable in your shell init file, such as
.bashrcor.zshrc:
export GTAGSLIBPATH=$HOME/.gtags/
- Execute these commands in your terminal:
# Create a directory for holding database, since
# you cannot create a database in your system paths
mkdir ~/.gtags

# Create symbolic links to your external libraries
ln -s /usr/include usr-include
ln -s /usr/local/include/ usr-local-include

# Generate GNU Global database
gtags -c
The -c option tells GNU Global to generate tag database in compact
format. It is necessary because if your project contains C++ headers like
Boost, without -c your GTAGS database can be more than 1 GB. Same
goes for ctags. The GNU Global devs explained that it is because
the GTAGS database includes the image of tagged line, and the Boost
headers have a lot of very long lines.
After all the above steps, restart with a shell loaded with that
variable. To verify Emacs gets the variable, M-x getenv and enter
GTAGSLIBPATH and see if your predefined value is
available. Executing ggtags-find-tag-dwim or helm-gtags-dwim jumps
to the definition of a system tag like a normal tag.
The disadvantage of using GNU Global is that currently it cannot
include files without extension. In the C++ system include directory
like /usr/include/c++/4.8/, it contains files without extension such
as iostream, string, set, map…. so you can write #include
directives without having to append .h at the end. GNU Global devs
are considering to add support for this use case.
Project management with Projectile
Projectile is a project interaction library for Emacs. Its goal is to
provide a nice set of features operating on a project level without
introducing external dependencies(when feasible). For instance -
finding project files has a portable implementation written in pure
Emacs Lisp without the use of GNU find (but for performance sake an
indexing mechanism backed by external commands exists as well).
Projectile tries to be practical - portability is great, but if some external tools could speed up some task substantially and the tools are available, Projectile will leverage them.
By default, git, mercurial, darcs and bazaar are considered
projects. So are lein, maven, sbt, scons, rebar and
bundler. If you want to mark a folder manually as a project just
create an empty .projectile file in it.
You also install Projectile using MELPA and setup:
(projectile-global-mode)
Prefix key of Projectile is C-c p. Some notable features:
- Jump to any file in the project: C-c p f.
- Jump to any directory in the project: C-c p d.
- List buffers local to current project: C-c p b.
- Jump to recently visited files in project: C-c p e.
- Grep in project: C-c p g s
- Multi-occur in project buffers: C-c p o.
- Simple refactoring with text replace in current project: C-c p r.
- Switch visited projects (visited once an Projectile remembers): C-c p p.
Useful commands for working with C/C++ projects:
- Run compilation command at project root: C-c p c. By default,
Projectile prompts the
makecommand. - Switch between
.hand.cor.cpp: C-c p a. If the filename - without file extension - of current editing buffer is part of other files, those files are listed as well. If there is only one file with the same name but different extension, switch immediately. Here is a demo:
There are more, you can find it in my Projectile guide. You can also run C-c p C-h for a list of commands with C-c p prefix.
Source code information
Command: global-semantic-idle-summary-mode
This mode, when enabled, displays function interface in the minibuffer:
It works well for C but not C++, since C++ can overload function and
semantic-idle-summary-mode can only display one interface at a
time. Since this mode is part of Semantic, it also relies on
SemanticDB that is created from parsing source files.
Setup:
(global-semantic-idle-summary-mode 1)
Command: global-semantic-stickyfunc-mode
When enable, this mode shows the function point is currently in at the first line of the current buffer. This is useful when you have a very long function that spreads more than a screen, and you don't have to scroll up to read the function name and then scroll down to original position.
Setup:
(add-to-list 'semantic-default-submodes 'global-semantic-stickyfunc-mode)
One of the problem with current semantic-stickyfunc-mode is that it
does not display all parameters that are scattered on multiple lines.
This package handles that problem: semantic-stickyfunc-enhance. Extra:
stock semantic-stickyfunc-mode does not include assigned values to
function parameters of Python. This package also fixed that problem.
You can click the link to see demos.
You can install the package via MELPA and load it:
(require 'stickyfunc-enhance)
Source code documentation
Command: man
To read the documentation for symbol at point or a man entry of your
choice, invoke M-x man.
Command: helm-man-woman
If you use Helm, you should be able to use the command
helm-man-woman, which is bound to C-c h m if you follow my Helm
guide. The full guide for the command is here.
Source code editing
Folding
Emacs has a minor mode called hs-minor-mode that allows users to
fold and hide blocks of text. Blocks are defined by regular
expressions which match the start and end of a text region. For
example, anything in between { and } is a block. The regular
expressions are defined in hs-special-modes-alist.
Setup for C/C++:
(add-hook 'c-mode-common-hook 'hs-minor-mode)
Default key bindings:
| Key | Binding |
|---|---|
| C-c @ C-c | Command: hs-toggle-hiding |
| Toggle hiding/showing of a block | |
| C-c @ C-h | Command: hs-hide-block |
| Select current block at point and hide it | |
| C-c @ C-l | Command: hs-hide-level |
| Hide all block with indentation levels | |
| below this block | |
| C-c @ C-s | Command: hs-show-block |
| Select current block at point and show it. | |
| C-c @ C-M-h | Command: hs-hide-all |
| Hide all top level blocks, displaying | |
| only first and last lines. | |
| C-c @ C-M-s | Command: hs-show-all |
| Show everything |
Demo:
- Command:
hs-toggle-hiding

Narrowing
Narrowing means making only a text portion in current buffer
visible. Narrowing is useful when you want to perform text editing on
a small part of the buffer without affecting the others. For example,
you want to delete all printf statements in current functions, using
flush-lines command. But if you do so, you will also delete printf
outside the current function, which is undesirable. By narrowing, you
can safely remove all those printf and be certain that nothing else
is changed accidentally.
Default key bindings:
| Key | Binding |
|---|---|
| C-x n d | Command: narrow-to-defun |
| Narrow buffer to current function at point | |
| C-x n r | Command: narrow-to-region |
| C-x n n | Narrow buffer to active region |
| C-x n w | Command: widen |
| Widen buffer |
Identation
Setup default C style
Emacs offers some popular C coding styles. Select the one suitable for you:
;; Available C style:
;; “gnu”: The default style for GNU projects
;; “k&r”: What Kernighan and Ritchie, the authors of C used in their book
;; “bsd”: What BSD developers use, aka “Allman style” after Eric Allman.
;; “whitesmith”: Popularized by the examples that came with Whitesmiths C, an early commercial C compiler.
;; “stroustrup”: What Stroustrup, the author of C++ used in his book
;; “ellemtel”: Popular C++ coding standards as defined by “Programming in C++, Rules and Recommendations,” Erik Nyquist and Mats Henricson, Ellemtel
;; “linux”: What the Linux developers use for kernel development
;; “python”: What Python developers use for extension modules
;; “java”: The default style for java-mode (see below)
;; “user”: When you want to define your own style
(setq
 c-default-style "linux" ;; set style to "linux"
 )
Setup indentation
By default, Emacs won't indent when press RET because the command
bound to RET is newline. You can enable automatic indentation by
binding RET to newline-and-indent.
(global-set-key (kbd "RET") 'newline-and-indent) ; automatically indent when press RET
When working with source code, we must pay attention to trailng whitespace. It is always useful to view whitespace in current buffer before committing your code.
;; activate whitespace-mode to view all whitespace characters
(global-set-key (kbd "C-c w") 'whitespace-mode)

;; show unncessary whitespace that can mess up your diff
(add-hook 'prog-mode-hook (lambda () (interactive) (setq show-trailing-whitespace 1)))

;; use space to indent by default
(setq-default indent-tabs-mode nil)

;; set appearance of a tab that is represented by 4 spaces
(setq-default tab-width 4)
To clean up trailing whitespace, you can also run whitespace-cleanup
command.
To convert between TAB and space, you also have two commands:
tabify to turn an active region to use TAB for indentation, and
untabify to turn an active region to use space for indentation.
Package: clean-aindent-mode
When you press RET to create a newline and got indented by
eletric-indent-mode, you have appropriate whitespace for
indenting. But, if you leave the line blank and move to the next line,
the whitespace becomes useless. This package helps clean up unused
whitespace.
View this Emacswiki page for more details.
;; Package: clean-aindent-mode
(require 'clean-aindent-mode)
(add-hook 'prog-mode-hook 'clean-aindent-mode)
Package: dtrt-indent
A minor mode that guesses the indentation offset originally used for creating source code files and transparently adjusts the corresponding settings in Emacs, making it more convenient to edit foreign files.
This package is really useful when you have to work on many different projects (for example, your project consists of many git submodules) that use different indentation format. One project might use TAB for indentation; another project might use space for indentation. Having to manually switch between TAB and space is tiresome. We should let Emacs take care of it automatically. This package does exactly that. However, if a project mixes TAB and space, then the package will have a hard time to detect. But then again, if you work on such project, it doesn't matter anyway.
Setup:
;; Package: dtrt-indent
(require 'dtrt-indent)
(dtrt-indent-mode 1)
If you use Semantic for code completion, you may one to turn off
dtrt-indent messages since Semantic may visit many files for
parsing, and each file entered a message from dtrt-indent is printed
in echo area and might become a constant annoyance.
(setq dtrt-indent-verbosity 0)
Package: ws-butler
ws-butler helps managing whitespace on every line of code written or
edited, in an unobtrusive, help you write clean code without noisy
whitespace effortlessly. That is:
- Only lines touched get trimmed. If the white space at end of buffer is changed, then blank lines at the end of buffer are truncated respecting require-final-newline.
- Trimming only happens when saving.
With clean-aindent-mode and dtrt-indent and ws-butler, you
could totally forget about whitespace. If you are careful, turn on
whitespace-mode (bound to C-c w above) and check for whitespace
before committing.
Setup:
  ;; Package: ws-butler
(require 'ws-butler)
(add-hook 'c-mode-common-hook 'ws-butler-mode)
Code template using yasnippet
YASnippet is a template system for Emacs. It allows you to type an abbreviation and automatically expand it into function templates. Bundled language templates include: C, C++, C#, Perl, Python, Ruby, SQL, LaTeX, HTML, CSS and more. The snippet syntax is inspired from TextMate's syntax, you can even import most TextMate templates to YASnippet.
Setup:
;; Package: yasnippet
(require 'yasnippet)
(yas-global-mode 1)
Usage:
In major modes where yasnippet has snippets available,
typing a certain keyword and TAB insert a predefined snippet. For
example, in a C buffer, if you type for and TAB, it expands to:
for (i = 0; i < N; i++) {
    ...point will be here....
}
You can view supported snippets here.
Package: smartparens
smartparens is a minor mode that provides many features for
manipulating pairs. Pair can be simple as parentheses or brackets, or
can be programming tokens such as if … fi or if … end in
many languages. The most basic and essential feature is automatic
closing of a pair when user inserts an opening one.
  ;; Package: smartparens
(require 'smartparens-config)
(show-smartparens-global-mode +1)
(smartparens-global-mode 1)

;; when you press RET, the curly braces automatically
;; add another newline
(sp-with-modes '(c-mode c++-mode)
  (sp-local-pair "{" nil :post-handlers '(("||\n[i]" "RET")))
  (sp-local-pair "/*" "*/" :post-handlers '((" | " "SPC")
                                            ("* ||\n[i]" "RET"))))
For complete documentation, please refer to Smartparens manual.
Compilation Support
Compilation mode turns each error message in the buffer into a hyperlink. You can click on each error, or execute a key binding like RET to jump to the location of that error.
The following key bindings are available:
| Key | Description |
|---|---|
| C-o | Display matched location, but do not switch point to matched buffer |
| M-n | Move to next error message, but do not visit error location |
| M-p | Move to next previous message, but do not visit error location |
| M-g n | Move to next error message, visit error location |
| M-g p | Move to previous error message, visit error location |
| RET | Visit location of error at poiint |
| M-{ | Move point to the next error message or match occurring in a different file |
| M-} | Move point to the previous error message or match occurring in a different file |
| q | Quit *compilation* buffer |
I usually execute the same compilation command many times. It's more convenient if Emacs doesn't ask us to confirm every time we re-execute a command:
(global-set-key (kbd "<f5>") (lambda ()
                               (interactive)
                               (setq-local compilation-read-command nil)
                               (call-interactively 'compile)))
If you want to enter a new command, add prefix argument before
pressing <f5>.
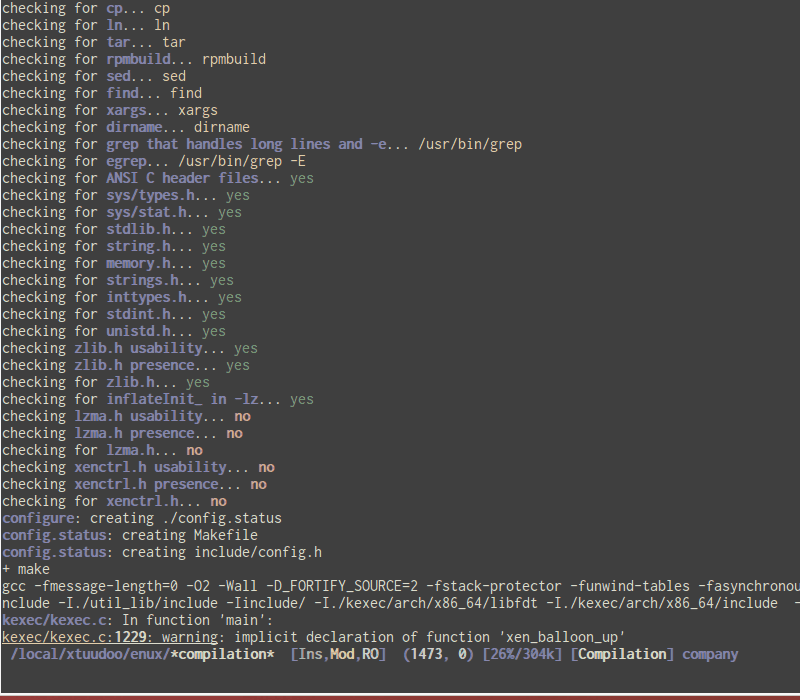
Demo:
As you can see, output in *compilation* buffer looks much better
than in plain terminal with colors and you can also interact with it.
You can also run other shell commands in here, not just compilation
commands. A really cool thing with compilation-mode is that it is
asynchronous. That is, if your source files contain errors, you don't
have to wait for the whole compilation process to finish. You can
examine the errors right away in the *compilation* buffer, while the
compilation process keeps going.
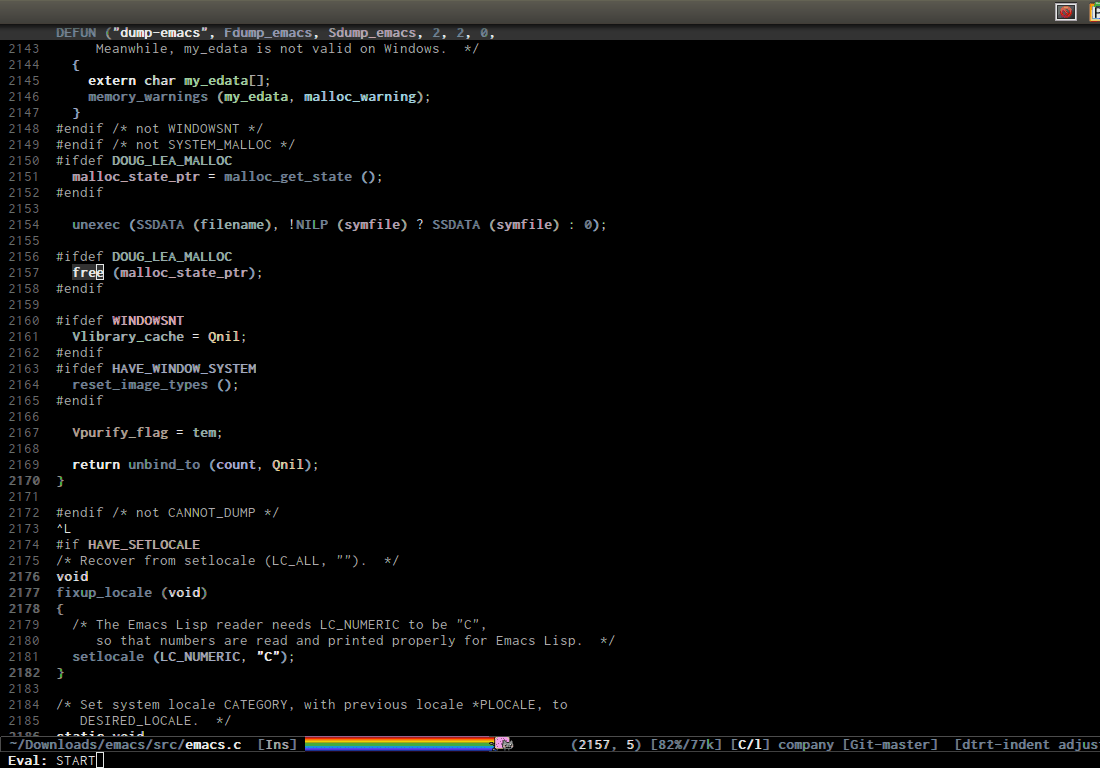
When you compile with compilation-mode, your shell output is
processed and highlighted with beautiful colors to easy your reading:
TIP: It is useful to open a Dired buffer of the project root and store a window configuration that contains it into a register, so you can always jump back to project root any where, any time and run compilation command. If you do not use know how to use registers to store window configurations, read it here.
Debugging
With GDB Many Windows
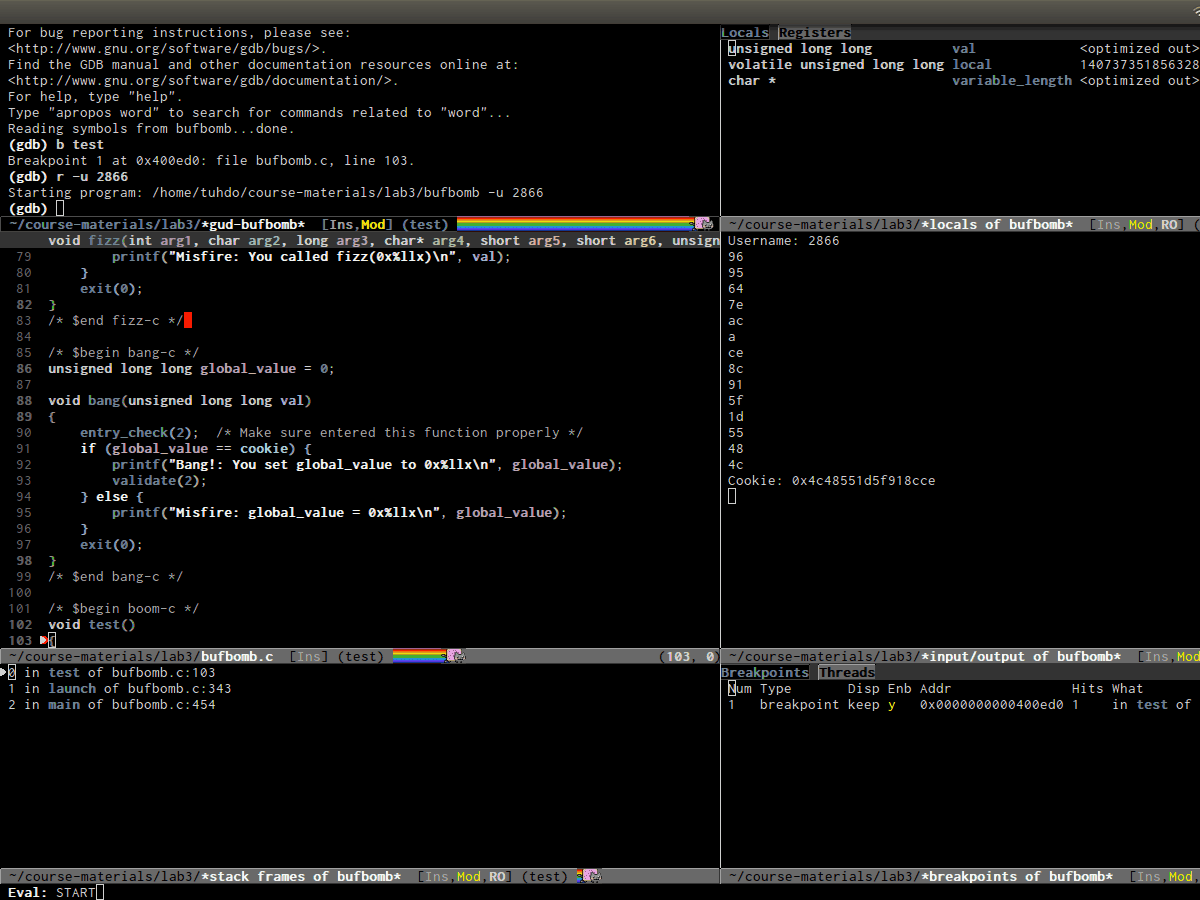
Emacs has built-in frontend support for GDB that provides IDE-like interface. It has a layout like this:
Stock Emacs doesn't enable this layout by default. You have to
tell Emacs to always use gdb-many-windows:
(setq
 ;; use gdb-many-windows by default
 gdb-many-windows t

 ;; Non-nil means display source file containing the main routine at startup
 gdb-show-main t
 )
Now, find a binary built for debugging, and start GDB by M-x
gdb. Emacs prompts asking you how to run gdb. By default, the
prompt looks like this:

To use gdb-many-windows, you must always supply the -i=mi argument
to gdb, otherwise gdb-many-windows won't work. By default, as you've
seen the layout of gdb-many-windows above, you have the following
buffers visible on your screen (ignore the first row):
| 1. GUD interaction buffer | 2. Locals/Registers buffer |
| 3. Primary Source buffer | 4. I/O buffer for debugging program |
| 5. Stack buffer | 6. Breakpoints/Threads buffer |
Each cell coressponds to the following commands:
gdb-display-gdb-buffer(Cell 1): This is where you entergdbcommands, the same as in terminal. When you kill this buffer, other GDb buffers are also killed and debugging session is terminated.gdb-display-locals-buffer(Cell 2): display local variables and its values in current stack frame. Please refer to GNU Manual - Other GDB Buffers for usage of the buffer.gdb-display-registers-buffer(Cell 2): registers values are displayed here. Please refer to GNU Manual - Other GDB Buffers for usage of the buffer.- Your source buffer (Cell 3): Your source code for stepping through out the debugging session. Please refer to GNU Manual - Source Buffers for usage of the buffer.
gdb-display-io-buffer(Cell 4): This is where your program displays output and accepts input. In stock GDB (Command Line Interface), you enter input whenever a program asks for one under GDB prompt. Usinggdb-many-windows, you must enter program input here.gdb-display-stack-buffer(Cell 5): Display function call stack. Please refer to GNU Manual - Stack buffer for usage.gdb-display-breakpoints-buffer(Cell 6): Display a list of breakpoints. Please refere to GNU Manual - Breakpoints Buffer for usage of the buffer.gdb-display-threads-buffer(Cell 6): Display running threads in your programs. Please refer to GNU Manual - Threads Buffer and Multithreaded Debugging for usage of the buffer.
There are two useful commands that are not visible in
gdb-many-windows:
gdb-display-disassembly-buffer: displays the current frame as assembly code.gdb-display-memory-buffer: displays a portion of program memory.
There are another variants of the above buffers, with gdb-frame
prefix instead of gdb-display. When you run commands with
gdb-frame prefix, the buffers are opened in a new frame instead of
occupying an existing window. This is useful when you have 2 monitors,
one is for the standard gdb-many-windows layout and another one is
for displaying disassembly buffer and memory buffer in a separate
frame.
With Grand Unified Debugger - GUD
The Grand Unified Debugger, or GUD for short, is an Emacs major mode for debugging. It works on top of command line debuggers. GUD handles interaction with gdb, dbx, xdb, sdb, perldb, jdb, and pdb, by default. Emacs provides unified key bindings for those debuggers. We only concern about GDB in this guide.
GUD works by sending text commands to a debugger subprocess, and
record its output. As you debug the program, Emacs displays relevant
source files with an arrow in the left fringe indicating the current
execution line. GUD is simple and stable. When starting GUD, you only
have a GDB command buffer and your source file. If you like
simplicity, you can use GUD. However, you can still use other
gdb-display- or gdb-frame- variants listed in previous section
when needed.
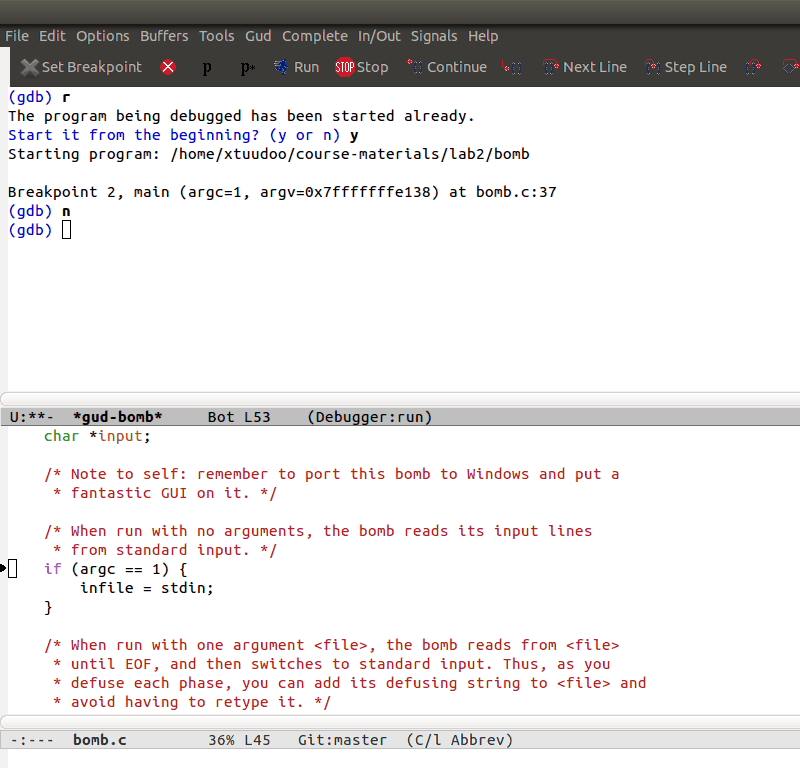
As you can see, the default Emacs interface also includes a menu for regular debugging operations, such as Stop, Run, Continue, Next Line, Up/Down Stack…
Refer to a list of commands supported by GUD at GNU Emacs Manual - Commands of GUD. Note that these key bindings not only work with GDB, but any debuggers supported by GUD, since it's a Grand Unified Debugger.
There's an Emacs packages that offers support for more debuggers: emacs-dbgr. Here is the list of supported debuggers. If you have to work with many languages, use GUD.